All Categories
Featured
Table of Contents
- – Bathroom Tub Remodel El Cerrito, CA
- – United Constructors Inc.
- – Remodeling Bathroom El Cerrito, CA
- – Bathroom Remodeling Company El Cerrito, CA
- – Remodeling Bathroom Contractors El Cerrito, CA
- – Bathroom Remodelers Close To Me El Cerrito, CA
- – Bathroom Remodel Near Me El Cerrito, CA
- – Remodel Bathroom Near Me El Cerrito, CA
- – Bathroom Tub Remodel El Cerrito, CA
- – Bathroom Remodeling Contractors Near Me El C...
- – Bathroom Remodel Near Me El Cerrito, CA
- – Remodel Bathroom Near Me El Cerrito, CA
- – Bathroom Remodelling El Cerrito, CA
- – United Constructors Inc.
Bathroom Tub Remodel El Cerrito, CA
, it was a huge wow! Our home was developed in 2000 so it still had the design from the 1990's.
We choose to bath so having a bathtub was another discussion. After looking and understanding I would need to spend upwards of $3000 for 2 vanities of any top quality, the decision was made to offer our current one's a makeover.
Using timeless and traditional coatings in an upgraded way functions best for our home. As a do it yourself pair we can create concepts as we go - El Cerrito Remodeling Bathroom. Ray likes that I provide some ideas and inspiration pictures or drawings to obtain a visual. He isn't creative the like me so he does not always see what my words are telling him.
Remodeling Bathroom El Cerrito, CA
I've constantly felt drawn in 2 directions until I realized it doesn't need to be so hard. Modern typical indoor design style personifies how I like our home to look and really feel. Mixing old and new in a basic, very little means is precisely just how what I love. As soon as I take a mental note of this I can move on in a room.
Creating the ceramic tile mix for the shower went from there. It was crucial to me, as it needs to be, those floor tile shade tones matched up with the rug.
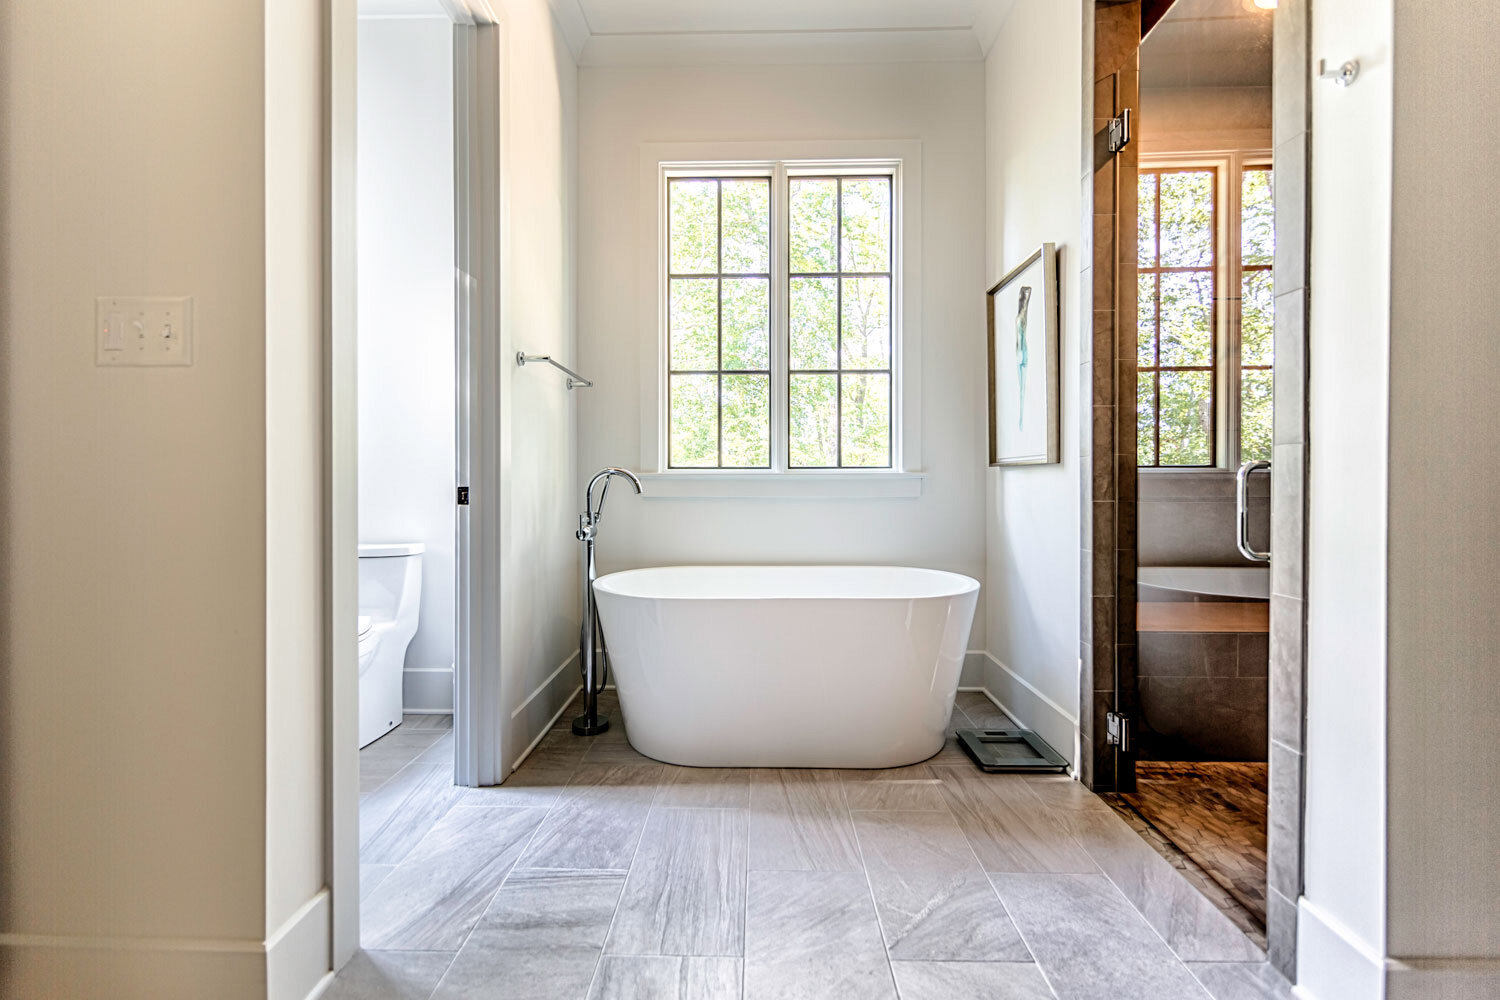
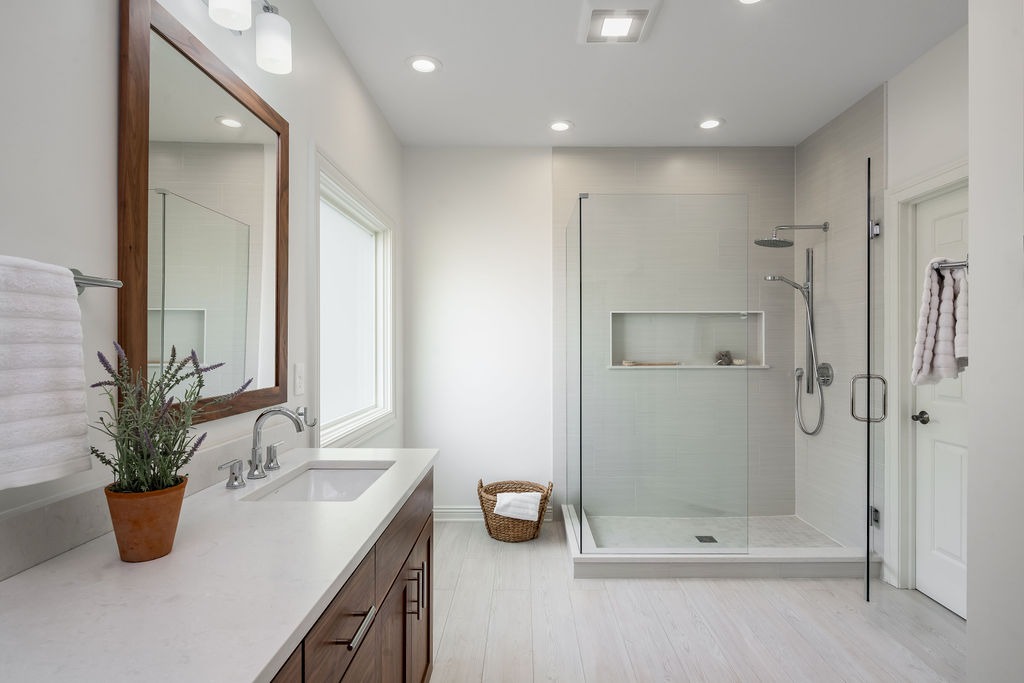
This will ensure the circulation of your home really feels easy. For the shower, I really did not want an item niche, I wanted the walk. It really felt really ageless and timeless to me. The style of the cut rack was a means to add the little specific niche detail. As soon as we got rid of the shower insert and the adjoining wall surface, we had the ability to expand the shower to a 4 x 4 foot space.
Bathroom Remodeling Company El Cerrito, CA
The vanity and countertops were still in fantastic shape but required even more information. The paint shade and wall surface detail provided the wow element I was wishing. It was Ray's innovative idea to make use of a shelf brace for the front information. Rather of constructing his very own furnishings appearance items, he acquired the brackets and cut them down to dimension.
The average price for a key washroom remodel noted on This Old Home website is $10,000-$30,000. Free standing tub $850 Bathtub fixtures $756 Pocket Door $550 Shower Fixtures (Brizo Essential Series) $1198 Floor and Style (floor tile and tiling materials) $1800 Glass door installed (the only thing we could not DIY) $1680 Paint and primer $350 Paint sprayer (talented) Professionals straight (Schluter system, water proofing, warmed electrical floor, thermostat) $1400 Ceiling timber from Flooring and Decoration $800 Materials (bead board, wood, devices, pipes $1924 Developing a restroom that was spacious, medspa like but still fit within our modern-day typical home design was the goal.
The listed below image is me standing in the shower to provide you a good sight of how it looks from there. We actually do not like to mount floor tile, primarily on the flooring and we intend to never do it once again. So just perhaps, we might pay a person following time for that component.
Remodeling Bathroom Contractors El Cerrito, CA
Looking onward to warm floors come winter season time. That would need new countertops too and I just do not believe it's worth it right now.
Restroom improvements are a popular home renovation project that can make your bathroom much more comfortable, practical, and visually pleasing. A fresh coat of paint is the quickest and most economical method to change your bathroom, offering an immediate refresh without major restoration prices.
Bathroom Remodelers Close To Me El Cerrito, CA
Pick a semi-gloss paint to increase mold and mold and mildew resistance. Semi-gloss is also easier to clean up. Maintain your shower room's design in mind when choosing a color pattern. You can not go incorrect with neutral tones if you want something timeless. Take into consideration the lights before selecting dark or strong hues. You can examine the paint on a little section of wall surface before committing.
Hang a spider plant, philodendron, pothos, or fern on the shower's far side, guaranteeing they do not accumulate too much water. Your focal factor might be behind the tub, on the back wall surface, or above the vanity. An accent wall surface in a small shower room might make the room feel even smaller and much more disjointed, yet you can still include visual passion by choosing for an accent ceiling.
Include upright cabinets beside the vanity to save your towels if you have the extra room, or utilize upright room to make the most of drifting shelves. You can add an over-the-toilet storage shelf or open shelving below the sink as a reliable storage space option. After years of usage, your bathroom's plumbing fixtures can start to experience various concerns.
Bathroom Remodel Near Me El Cerrito, CA
These are a few of one of the most expensive bathroom remodellings, but it's a sensible investment if your home's systems are old, obsolete, or otherwise operating appropriately. This can aid protect against future problems and boost your home's energy performance. El Cerrito Remodeling Bathroom. Property owners can finish improvements on their own depending upon their abilities, experience, and the job's extent and intricacy
Straightforward jobs such as painting, mounting components, or updating cupboard hardware are within the majority of house owners' abilities. Plumbing and electrical work, or those that require skilled carpentry, are best entrusted to pros. Not just do experts have the needed tools, yet they also have the expertise to complete these jobs securely and appropriately.
Remodel Bathroom Near Me El Cerrito, CA
When in uncertainty, go for a neutral shade combination. This will certainly ensure your bathroom continues to be timeless. Developers state that shades of blue, light green, and warmer neutral tones are the ideal restroom colors for 2024.
The job becomes a full-blown shower room remodelling that every person is excited concerning and you should end up. Lucky for you, I've got every phase of the remodel covered, with lots of suggestions to keep you within budget plan and on timetable. Disclosure: This message consists of some associate links or referral web links for your ease.
Before you can change any kind of area, you need to demo the area or get rid of all unwanted items. The first point I did was to dig out all the silicone around the bathtub, trim, walls, and anywhere else it was situated.
Bathroom Tub Remodel El Cerrito, CA
After separating everything, we dismantled them from the spaces (the old sink, bathroom, trim, wall, racks, and so on). We were ready to demo the ceramic tile.
Don't ask exactly how I understand this We uncovered some fixings that the previous proprietors had actually performed with the last bathroom restoration, which were not the very best. To fix them, we had to remove locations around the tub. And after the trial, we were entrusted this: Now, we were entrusted really damaged walls.
I set up a slim layer (1/4) of a subfloor sheet on top of the old subfloor to offer us a smooth, level surface. We were additionally able to lastly open up our brand-new home window to the space. SIDE NOTE: There were 2 windows, the old steel one and afterwards the brand-new vinyl one.
There was one outside and one on the inside to give you a double-pane window. Revealing the window implied that I could lastly shield it by completing the spaces around the home window with increasing foam. Next off, I cleaned the bathtub to remove all the thinset residue. I did this by spraying bathtub cleaner onto the location and enabling it to set for a couple of minutes.
Bathroom Remodeling Contractors Near Me El Cerrito, CA
After, I covered the openings in the walls with drywall and fixed the damaged plaster wall surfaces. SIDE NOTE: You can see the full in this article. The procedure is the exact same if you are covering and repairing drywall also! I additionally had the possibility to upgrade the illumination in the bathroom, which was my hubby's need with the restroom remodelling.
This, I topped and painted the restroom. Whenever you tile a flooring, you need to mount an underlayment.
Once the ceramic tiles had actually treated for 24 hours, I moved on to setting up the grout. After setting up the water resistant membrane on the flooring, I installed the shower wall surface waterproofer.
If you're wondering just how to install this waterproofer, click this web link to see how to water-proof tub shower walls over drywall. After the waterproofing membrane had actually treated for 24-hour, I carried on to tiling the shower wall surfaces. And below are all my suggestions for tiling a tub surround. Finally, I completed off the bath tub floor tile job by grouting the shower tiles, that includes securing the floor tiles and installing silicone.
Bathroom Remodel Near Me El Cerrito, CA
You can see the full procedure by clicking the web link. At this moment, the washroom awaited the decorative items. This included setting up floating racks (I have a tutorial on setting up drifting shelves over ceramic tile). We likewise bought a tiny sink from Ikea due to exactly how little of room we had.
I installed all new trim and walls, and added easy towel hooks. This entire renovation cost about $2,000. About $1,000 of that was for the floor and wall surface tiles. And we reused our bath tub, bathtub tap (which was only a year old), toilet, and vanity mirror. The complete remodelling took us a two months to complete yet the last look is modern, tidy, light and airy.
As soon as the ceramic tiles had actually cured for 1 day, I moved on to setting up the cement. Amusing sufficient, I locate grouting to be very stress-free. Click the web link to discover the full tutorial on exactly how to grout floor tiles. After installing the water resistant membrane on the floor, I installed the shower wall surface waterproofer.
After the waterproofing membrane had actually treated for 24 hours, I relocated on to tiling the shower walls., which consists of sealing the ceramic tiles and mounting silicone.
Remodel Bathroom Near Me El Cerrito, CA
You can see the full process by clicking the link. At this point, the restroom was prepared for the attractive items.
I installed all brand-new trim and baseboards, and included straightforward towel hooks. This whole improvement expense about $2,000. Concerning $1,000 of that was for the flooring and wall ceramic tiles. And we reused our bath tub, bath tub tap (which was only a year old), commode, and vanity mirror. The overall remodelling took us a two months to finish however the last appearance is modern, clean, light and ventilated.
Once the floor tiles had healed for 24 hr, I carried on to installing the grout. Amusing enough, I locate grouting to be extremely peaceful. Click the web link to discover the full tutorial on just how to grout floor ceramic tiles. After setting up the water resistant membrane layer on the floor, I mounted the shower wall waterproofer.
Bathroom Remodelling El Cerrito, CA
After the waterproofing membrane layer had actually healed for 24 hours, I relocated on to tiling the shower wall surfaces., which consists of securing the floor tiles and installing silicone.
You can see the complete process by clicking the link. Now, the bathroom was ready for the ornamental items. This included mounting floating shelves (I have a tutorial on mounting drifting racks over ceramic tile. We additionally bought a small sink from Ikea since of how little of area we had.
United Constructors Inc.
Address: 1251 Stone Valley Rd Alamo, CA 94507Phone: (925) 234-9023
Email: cash@builduci.com
United Constructors Inc.
Regarding $1,000 of that was for the flooring and wall floor tiles. And we reused our bathtub, bath tub faucet (which was only a year old), bathroom, and vanity mirror.
Bathroom Remodeler Near Me El Cerrito, CABathroom Remodelling El Cerrito, CA
Contractor For Bathroom Remodel El Cerrito, CA
Bathroom Remodel Company El Cerrito, CA
Bathroom Remodel Near Me El Cerrito, CA
Bathroom Remodel Service El Cerrito, CA
Best Bathroom Remodelers Near Me El Cerrito, CA
Contractors For Bathroom Remodel El Cerrito, CA
Best Bathroom Remodelers Near Me El Cerrito, CA
Bathroom Remodelers Close To Me El Cerrito, CA
Remodeled Bathrooms El Cerrito, CA
Bathroom Remodelling El Cerrito, CA
Remodeling Bathroom El Cerrito, CA
Bathroom Remodeling Services El Cerrito, CA
Bathroom Tub Remodel El Cerrito, CA
Bathroom Remodeling Services El Cerrito, CA
Bathroom Remodeling Contractor Near Me El Cerrito, CA
Bathroom And Remodeling El Cerrito, CA
Remodeling Small Bathrooms El Cerrito, CA
Remodeling Small Bathrooms El Cerrito, CA
Bathroom Remodel Companies Near Me El Cerrito, CA
Bathroom Remodeling Companies Near Me El Cerrito, CA
Contractor For Bathroom Remodel El Cerrito, CA
Bathroom Tub Remodel El Cerrito, CA
Remodeled Bathrooms El Cerrito, CA
Remodel Bathroom Near Me El Cerrito, CA
Bathroom Remodel Companies Near Me El Cerrito, CA
Remodeling Bathroom Contractors El Cerrito, CA
Close To Me Seo Expert El Cerrito, CA
Close By Seo Packages El Cerrito, CA
Remodeling Bathroom El Cerrito, CA
United Constructors Inc.
Table of Contents
- – Bathroom Tub Remodel El Cerrito, CA
- – United Constructors Inc.
- – Remodeling Bathroom El Cerrito, CA
- – Bathroom Remodeling Company El Cerrito, CA
- – Remodeling Bathroom Contractors El Cerrito, CA
- – Bathroom Remodelers Close To Me El Cerrito, CA
- – Bathroom Remodel Near Me El Cerrito, CA
- – Remodel Bathroom Near Me El Cerrito, CA
- – Bathroom Tub Remodel El Cerrito, CA
- – Bathroom Remodeling Contractors Near Me El C...
- – Bathroom Remodel Near Me El Cerrito, CA
- – Remodel Bathroom Near Me El Cerrito, CA
- – Bathroom Remodelling El Cerrito, CA
- – United Constructors Inc.
Latest Posts
Water Heater Repair Service Sabre Springs San Diego
Residential Plumbing Companies Near Me Tierrasanta San Diego
Plumbing Service Repair Olivenhain
More
Latest Posts
Water Heater Repair Service Sabre Springs San Diego
Residential Plumbing Companies Near Me Tierrasanta San Diego
Plumbing Service Repair Olivenhain