All Categories
Featured
Table of Contents
- – Motorhome Generator Repair Near Me Brea, CA
- – OCRV Center
- – Rv Repair Centers Near Me Brea, CA
- – Rv Repair Places Near Me Brea, CA
- – Motorhome Refrigerator Repair Brea, CA
- – Rv Refrigerator Repair Near Me Brea, CA
- – Rv Repair Service Near Me Brea, CA
- – Rv Mechanics Near Me Brea, CA
- – Motorhome Generator Repair Near Me Brea, CA
- – Rv Solar Panel Installation Brea, CA
- – Rv Service Repair Near Me Brea, CA
- – Motorhome Service And Repair Near Me Brea, CA
- – Rv Service And Repair Near Me Brea, CA
- – Rv Solar Installation Brea, CA
- – OCRV Center
Motorhome Generator Repair Near Me Brea, CA
Legitimate only at participating CAMPING WORLD locations. See dealership for information. Government fees, state taxes, dealership fees and emissions testing costs as suitable will be included to abide with state vehicle codes.
We have actually striven to ensure precision in the info given. New unit photography for picture objectives just. Specifications, equipment, technical information, photographs and images are based on details offered at time of publishing and go through alter without notification. Stock and floorplans vary by place, not all advertised manufacturers available at getting involved suppliers.
Rv Repair Centers Near Me Brea, CA
Might not be combined with any various other offer and not applicable to previous sales. Deal( s) legitimate at any type of Outdoor camping World RV Sales or FreedomRoads supplier just. See dealership for information. 2025 FreedomRoads, LLC. OUTDOOR CAMPING WORLD and the CAMPING WORLD Logo design are signed up trademarks of CWI, LLC. and utilized with authorization.
All civil liberties booked. FreedomRoads LLC, its related dealers and innovation partners are exempt for mistakes in rate or errors in summary of problem of an automobile's listed tools, accessories, cost or warranties. Any and all distinctions have to be resolved before the sale of this vehicle. Choice to offer a RV no matter price is exclusively figured out by the marketing dealer. * Ideal offer or $1,000 - deal must be in composing and acquired from a licensed RV dealership.
Rv Repair Places Near Me Brea, CA
To receive guaranteed trade-in value and/or assessment, vehicle needs to be in same or substantially the exact same condition it was in sometimes of offer. All deals undergo assessment. $1,000 money will certainly hurt in the form of cash money, check, or cash order. Not valid in LA or OR.
Client should offer legitimate buyers order authorized by management of contending supplier and appropriate documents detailing design year, make, brand name, design, choices, specifications, shades, and vin # of advertised device. Customers order valid for one month from time of write up. Contending dealership will certainly be any kind of qualified RV dealership as recognized by the State in which the dealership runs and is not an Outdoor Camping World Motor Home Sales or FreedomRoads supplier.
Any relevant trade-in should be disclosed and attended to assessment at time of demand. Not applicable to prior sales. See dealership for details. Not valid in The golden state. Void where forbidden.
With the expense of whatever growing, We guarantee the most effective pricing as feasible, Whether you need a routine evaluation, repair service, or emergency repairs.
Motorhome Refrigerator Repair Brea, CA
Tri State Rv Repair work has registered and accredited recreational vehicle professionals on site to ensure that you can have the confidence in the fixings we do. With combined experience of more than 60 years combind no task is also big. The training that is involved in the signed up and certified programs by the RVDA-RVIA makes TriState recreational vehicle Fixing the only option to bring your motor home in for the fixings and solutions required to maintain you RVing.
We can do significant body repairs, consisting of accident and interior remediation from water damage. Tristate RV Repair Work, is the leader in the Recreational vehicle fixing industry.
At Tristate Recreational Vehicle Repair service we are geared up to fix all domestic and imported RV's to their specifications. Our RV fixing solution uses job on: engines, transmissions, drive trains, indoor and outside body work, re-upholstery, bars, electronic devices, sound systems therefore far more. At Tristate recreational vehicle Repair your automobile will be repaired by skilled, experienced, certified professionals whose goals are the high quality and safety and security of their repairs.
Rv Refrigerator Repair Near Me Brea, CA
Our credibility is improved the top quality of our work and a commitment to providing you with the best RV solution experience possible. Unlike car dealerships that focus on sales, our mission is to keep and repair the recreational vehicle you already ownkeeping it road-ready and reputable. Our single emphasis is providing high-grade fixings and upkeep to keep your recreational vehicle performing at its finest.
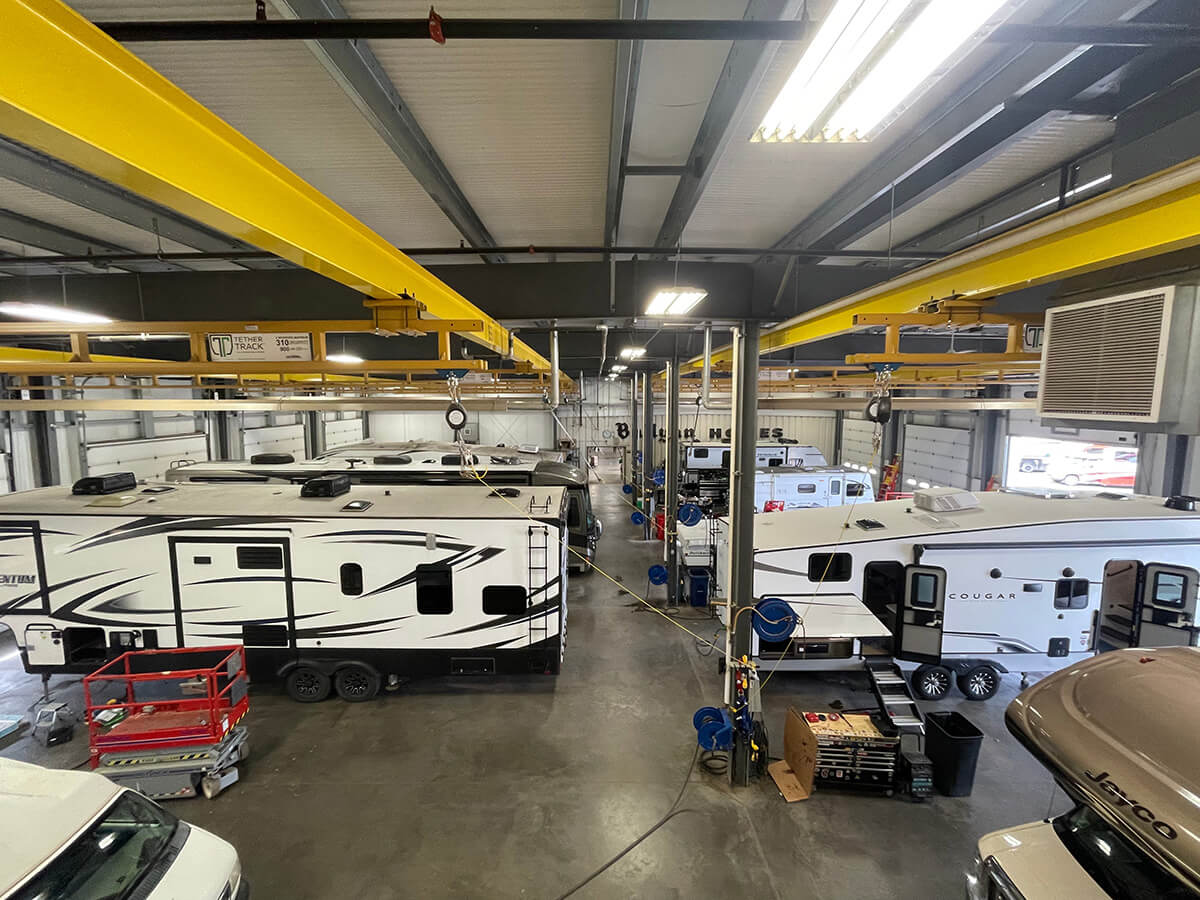
We service 35 RVs daily, keeping a steady pace that makes certain customized focus and prompt service for each system. Many repair services are finished within 12 weeks. Period might differ depending on the nature of the repair, components schedule, and seasonal demand. Some units might be completed sooneror periodically, laterthan estimated (Motorhome Service And Repair Near Me Brea).
We understand the seasonal nature of RV use. We think in open interaction and keep you educated throughout your RV's service procedure.
Rv Repair Service Near Me Brea, CA
Readily available to qualified purchasers based on loan provider credit score credentials. Legitimate just at getting involved outdoor camping WORLD locations. See dealer for details. Gap where restricted. Prices are inclusive of all available price cuts. Government fees, state tax obligations, dealer fees and discharges testing charges as suitable will certainly be included in comply with state vehicle codes.
Requirements, tools, technical information, photographs and pictures are based on info offered at time of uploading and are subject to alter without notice. Inventory and floorplans vary by place, not all advertised manufacturers available at participating dealers.
Might not be incorporated with any type of other offer and not relevant to previous sales. Deal( s) valid at any Camping World Motor Home Sales or FreedomRoads dealership only. See dealership for details.
Rv Mechanics Near Me Brea, CA
Decision to sell a Recreational vehicle no matter of cost is only established by the marketing supplier. * Ideal offer or $1,000 - offer needs to be in creating and obtained from a qualified RV supplier.
To obtain guaranteed trade-in worth and/or assessment, vehicle has to be in very same or substantially the exact same problem it was in at time of deal. All offers are subject to inspection.
Motorhome Generator Repair Near Me Brea, CA
Consumer needs to offer legitimate purchasers order signed by management of completing dealership and correct documentation describing model year, make, brand name, model, alternatives, specifications, shades, and vin # of promoted unit. Buyers order valid for 30 days from time of create up. Completing supplier will be any licensed recreational vehicle dealership as acknowledged by the State in which the dealership runs and is not an Outdoor Camping World Recreational Vehicle Sales or FreedomRoads dealer.
Any kind of suitable trade-in needs to be disclosed and offered assessment at time of demand. Not relevant to previous sales. See dealership for information. Not legitimate in The golden state. Gap where prohibited.
Rv Solar Panel Installation Brea, CA
I choose to give Mike a shot based upon his excellent evaluations and everybody was exact except the suppose consumer that left a much less then five celebrity evaluation. Mike as well really did not make me seem like simply a customer, however really felt like he was a good friend of mine going to offer an assisting hand.
Fireside Motor home is a regional home town Motor home fixing service. We service all kinds of Recreational vehicles and the systems that make them function.
At Appalachian RV Repair Work - Components & Solution, our objective is to supply top notch motor home components and service to boost your traveling experience. We are committed to guaranteeing that your RV remains in leading condition, enabling you to discover the open airs with satisfaction.
Rv Service Repair Near Me Brea, CA

Legitimate just at getting involved CAMPING Globe places. See dealership for information. Federal government charges, state tax obligations, dealer costs and exhausts screening costs as appropriate will certainly be included to conform with state automobile codes.
Specs, devices, technological information, pictures and illustrations are based on info offered at time of posting and are subject to alter without notification. Supply and floorplans differ by area, not all promoted manufacturers offered at getting involved suppliers.
Motorhome Service And Repair Near Me Brea, CA
May not be incorporated with any other offer and not suitable to previous sales. Deal( s) valid at any type of Camping World Recreational Vehicle Sales or FreedomRoads dealer only. See supplier for information.
Choice to market a RV regardless of cost is only determined by the marketing dealer. * Best offer or $1,000 - deal has to be in writing and gotten from an accredited RV supplier.
Rv Service And Repair Near Me Brea, CA
To receive assured trade-in value and/or assessment, car should be in exact same or significantly the same condition it was in at time of deal. All offers are subject to examination.
Customer should offer legitimate purchasers order signed by administration of contending dealership and proper documents detailing design year, make, brand name, design, choices, specs, shades, and vin # of marketed unit. Purchasers order legitimate for one month from time of create up. Competing supplier will be any licensed motor home dealership as identified by the State in which the supplier runs and is not an Outdoor Camping World Motor Home Sales or FreedomRoads supplier.
See dealership for details. Not legitimate in California.
Denise was so positive and suiting! The facility is excellent for our needs: space to maneuver, flat, tidy, and near to home. Motorhome Service And Repair Near Me Brea. We like that there is a dump station, water fill station, cleaning atations, and air/vacuum available.
Rv Solar Installation Brea, CA
Maintaining the RV in tip-top form is something that several RV lovers believe regarding continuously. It takes cautious maintenance to ensure that your RV will certainly last for lots of trips to find. That holding true, you need to see to it that you get an appointment on your recreational vehicle often.
We understand how critical it is for you to get RV upkeep at the appropriate time. As a result, we provide a selection of upkeep special deals and vouchers to minimize your yearly motor home ownership price. Do not hesitate to publish out and bring the ideal solution coupons with you when you bring your motor home in for maintenance.
What are the best rv repair service near me? Several of the best rv fixing near me are: What are one of the most reviewed motor home repair near me? A few of the most evaluated recreational vehicle repair service near me are:
OCRV Center
Address: 23281 La Palma Ave Yorba Linda, CA 92887Phone: (714) 909-1444
Email: art@ocrvcenter.com
OCRV Center
Denise was so pleasurable and fitting! The center is ideal for our needs: room to maneuver, flat, tidy, and close to home. We such as that there is a dump station, water fill station, cleaning atations, and air/vacuum readily available too.
Rv Solar Installation Brea, CARv Solar Panel Installation Brea, CA
Rv Service And Repair Near Me Brea, CA
Rv Refrigerator Repair Near Me Brea, CA
Rv Ceiling Repair Brea, CA
Rv Mechanics Near Me Brea, CA
Motorhome Refrigerator Repair Brea, CA
Rv Delamination Repair Near Me Brea, CA
Rv Delamination Repair Near Me Brea, CA
Rv Plumbing Repair Near Me Brea, CA
Rv Mechanics Near Me Brea, CA
Rv Repair Shops Near My Location Brea, CA
Rv Repair Shops Near My Location Brea, CA
Rv Refrigerator Repair Near Me Brea, CA
Motorhome Repair Near Me Brea, CA
Rv Service Repair Near Me Brea, CA
Motorhome Awning Repair Brea, CA
Rv Ceiling Repair Brea, CA
Rv Delamination Repair Near Me Brea, CA
Rv Repair In My Area Brea, CA
Rv Repair Services Near Me Brea, CA
Rv Floor Repair Near Me Brea, CA
Motorhome Generator Repair Near Me Brea, CA
Rv Repair Shops Near My Location Brea, CA
Rv Repair Places Near Me Brea, CA
Motorhome Service And Repair Near Me Brea, CA
Rv Mechanics Near Me Brea, CA
Rv Solar Installation Brea, CA
Rv Floor Repair Near Me Brea, CA
Rv Solar Panel Installation Brea, CA
Motorhome Repair Near Me Brea, CA
Rv Delamination Repair Near Me Brea, CA
Rv Repair And Service Near Me Brea, CA
Rv Repair And Service Near Me Brea, CA
Rv Service Repair Near Me Brea, CA
Rv Floor Repair Near Me Brea, CA
Rv Repair Centers Near Me Brea, CA
Motorhome Service And Repair Near Me Brea, CA
Motorhome Generator Repair Near Me Brea, CA
Rv Refrigerator Repair Near Me Brea, CA
Rv Solar Installation Brea, CA
Rv Refrigerator Repair Near Me Brea, CA
Rv Generator Repair Brea, CA
Rv Service Repair Near Me Brea, CA
Motorhome Generator Repair Near Me Brea, CA
Rv Repair And Service Near Me Brea, CA
Motorhome Awning Repair Brea, CA
Rv Service And Repair Near Me Brea, CA
Rv Ceiling Repair Brea, CA
Motorhome Repair Near Me Brea, CA
Rv Solar Panel Installation Brea, CA
Rv Refrigerator Repair Near Me Brea, CA
Motorhome Refrigerator Repair Brea, CA
Rv Ceiling Repair Brea, CA
Rv Ceiling Repair Brea, CA
Rv Solar Panel Installation Brea, CA
Rv Repair Centers Near Me Brea, CA
Rv Repair And Service Near Me Brea, CA
Rv Service And Repair Near Me Brea, CA
Rv Floor Repair Near Me Brea, CA
Rv Repair Centers Near Me Brea, CA
Camper Ac Repair Near Me Brea, CA
Rv Solar Panel Installation Brea, CA
Rv Solar Panel Installation Brea, CA
Rv Service And Repair Near Me Brea, CA
Rv Repairs Near Me Brea, CA
Rv Repair Centers Near Me Brea, CA
Rv Solar Panel Installation Brea, CA
Camper Ac Repair Near Me Brea, CA
Rv Delamination Repair Near Me Brea, CA
Full Service Rv Repair Near Me Brea, CA
Best Rv Repair Near Me Brea, CA
Motorhome Repair Near Me Brea, CA
Rv Repair Centers Near Me Brea, CA
Rv Repair In My Area Brea, CA
Motorhome Service And Repair Near Me Brea, CA
Motorhome Repair Near Me Brea, CA
Rv Solar Panel Installation Brea, CA
Close To Me Seo Optimization Services Brea, CA
Finding A Seo Companies Near Me Brea, CA
OCRV Center
Table of Contents
- – Motorhome Generator Repair Near Me Brea, CA
- – OCRV Center
- – Rv Repair Centers Near Me Brea, CA
- – Rv Repair Places Near Me Brea, CA
- – Motorhome Refrigerator Repair Brea, CA
- – Rv Refrigerator Repair Near Me Brea, CA
- – Rv Repair Service Near Me Brea, CA
- – Rv Mechanics Near Me Brea, CA
- – Motorhome Generator Repair Near Me Brea, CA
- – Rv Solar Panel Installation Brea, CA
- – Rv Service Repair Near Me Brea, CA
- – Motorhome Service And Repair Near Me Brea, CA
- – Rv Service And Repair Near Me Brea, CA
- – Rv Solar Installation Brea, CA
- – OCRV Center
Latest Posts
Swamp Cooler Leak Repair Valley Village
Evaporative Cooler Motor Repair Burbank
Universal City Repair Swamp Cooler Pan
More
Latest Posts
Swamp Cooler Leak Repair Valley Village
Evaporative Cooler Motor Repair Burbank
Universal City Repair Swamp Cooler Pan