All Categories
Featured
Table of Contents
- – Irrigation System Maintenance Walnut, CA
- – Pacific Green Landscape Maintenance
- – Irrigation Installer Walnut, CA
- – Lawn Sprinkler Companies Walnut, CA
- – Commercial Irrigation Services Walnut, CA
- – Lawn Sprinkler Companies Walnut, CA
- – Lawn Sprinkler Service Walnut, CA
- – Sprinkler System Installer Walnut, CA
- – Sprinkler System Installation Walnut, CA
- – Commercial Irrigation Repair Walnut, CA
- – Commercial Irrigation Services Walnut, CA
- – Sprinkler Installers Walnut, CA
- – Pacific Green Landscape Maintenance
Irrigation System Maintenance Walnut, CA
Pacific Green Landscape Maintenance
6530 Whittier Ave Whittier, CA 90601-3919(562) 203-3567
Pacific Green Landscape Maintenance
Appropriate hydration is crucial for healthy lawns in Northeast Ohio. The very best method to begin is with constant watering and also coverage across your landscapes. If you do not presently have a watering system in place or need to change an existing system, our landscape engineers are able to make and mount a custom-made landscape watering service for your residential property.
Sight our seasonal adjustment graphes for lawn and bed zones. To safeguard your landscape irrigation system throughout extreme Ohio winters months, we advise blowing out irrigation systems in the loss to eliminate most of the water. Then, in the spring when temperature levels remain over freezing, check and reactivate the systems. Discover more in our irrigation care overview.
Irrigation Installer Walnut, CA
Whether you require a drip system for your garden beds or a full sprinkler system installment, we've obtained you covered (Residential Irrigation Repair Walnut). Our watering systems are made to reduce water waste, making certain that each zone obtains the optimal amount of water and ensures full coverage. Our knowledgeable team guarantees your system is installed appropriately, staying clear of leakages, overwatering, or missed out on areas
Let us help you develop a water-efficient service that will keep your landscape growing for years to come.
Lawn Sprinkler Companies Walnut, CA
We take satisfaction in claiming what we will certainly do, and after that really doing what we claimed. We may not be excellent every single time, we constantly do it best or make it right. You will certainly see in our evaluations that we wait our products, our solutions and our job.
As Colorado starts to head into what'll certainly be an additional warm, dry summer season, irrigation services are selecting back up. As everybody turns the sprinklers back on for the year, professional irrigation services will certainly see to it that your home is dealt with. From spring start-ups, to leakage repairs, to brand-new watering system setup, experienced watering specialists will certainly have the ability to obtain one of the most out of your sprinklers while conserving as much water as feasible.
have a number of cutting-edge attributes that help take full advantage of water use effectiveness such as climate surveillance, rainfall sensing units, and intuitive apps that enable you to manage whatever remotely. Some are also able to close themselves off and send out signals if leaks or various other issues are spotted - Residential Irrigation Repair Walnut. Regular assessments and maintenance are the most effective way to maintain your watering system going for peak efficiency all summertime long
Routine inspections and maintenance will assist determine problems before they leave hand leaks, clogged up sprinkler heads, and roots are all usual watering system repair work. Irrigation system controllers are basically clocks that control when to transform the sprinklers on and for how long they remain on. Whether running an open loop or shut loophole system, proper configuration will maintain every little thing running smoothly.
Commercial Irrigation Services Walnut, CA
are usually established by hand using a clock, or a collection amount of water is input to control how much time the sprinklers run. Sometimes these can both be incorporated i.e. setting a certain time to begin the lawn sprinklers, and setting the system to stop when a specific amount of water has actually been used.
(i.e. wise systems) deal with procedure on their own. Shut loophole systems are extra expensive than open loop systems, but the financial savings on your water expense will usually balance out that cost in the lengthy run.
As quickly as winter begins to set in, it's time to. Residential Irrigation Repair Walnut. Frozen water can quickly harm pipelines, sprinkler heads, shutoffs, and various other elements, which can be expensive to fix come springtime. It's vital to ensure that timers or controllers are shut off, that all water has actually been drained/blown out of the system, which all above-ground parts are appropriately protected
It's crucial that you thoroughly evaluate the system during the start-up procedure to inspect for any type of broken elements or other issues. With Colorado in the middle of historic dry spell conditions, it's important that water is used uniformly to all areas of your residential or commercial property and that water is saved as much as feasible.
Lawn Sprinkler Companies Walnut, CA
Offer your yard and plants the proper quantity of water each and every single time with among our modern and reliable watering systems. We will certainly make and install your watering system to fit your home's requirements to make sure that you don't have to draw out the lawn sprinkler ever once more! If your home already has a watering system, our team can also carry out fixings, winterization, and startup solutions for your system.
Every residential or commercial property is various and will certainly need a customized system to obtain the very best results for your grass and landscape. Among our system alternatives is drip watering, which will certainly provide water straight to your plant's root area. Consequently, this will avoid wasting water and it will save you money down the line.
This is why our group supplies a winterizing service for your watering system. Utilize a commercial air compressor to blow all of the water out of your waterline, pipes, valves, and lawn sprinkler heads.
When springtime returns, it will certainly be time to reboot your watering system and prepare it for the warm weather condition ahead. It is essential to have a specialist team like ours restart your irrigation system because we have actually trained eyes that will identify any type of broken parts. Our crew will certainly see to it that whatever is functioning efficiently so that you get ideal water coverage entering into the expanding period.
Lawn Sprinkler Service Walnut, CA
Northeast Landscape Contractors will customized develop a watering system to meet your building's certain landscape requirements. We will take right into factor to consider, water pressure and gallons per minute, as well as plants and growing material.
There have actually been several improvements in lawn sprinkler systems over the last 10 years. New layouts of sprinklers and brand-new nozzles provide an even more even distribution of water over your entire lawn.
A rain sensing unit is one more economical method to save money, preserve water, and water your lawn much more efficiently. If you have a manual system, this is a great time to include a timer and to quit being a servant to your grass. As your landscape matures, hedges over grow the growing beds, and brand-new blockages are included in your yard, such as; sheds, patio areas, decks and attractive wall surfaces.
Northeast Landscape Specialists will be there to suggest you of the proper modifications and to complete the job in a prompt estate. Timers installed, changed and replacedBroken lines repairedBroken sprinkler heads replacedClogged heads cleansed and adjustedZone valves replaced or rebuiltLow voltage wire replacedOutdated systems updatedBackflow preventers mounted, fixed or replacedDrip systems repaired or replacedCheck all locations for proper insurance coverage Contact Northeast Landscape Professionals for all your watering solution needs.
Sprinkler System Installer Walnut, CA
Yard and landscape design watering is a popular, and often needed, addition to homes and companies. To attain healthy and rich lawns and landscapes, they must be watered on a regular basis on a regular timetable. Our customers in the Jackson, MS location, consisting of bordering areas like Brandon and Flowood, generally do not have the time or need to establish a hand-operated sprinkler system to sprinkle their grass and plants.
Making certain that your lawn and landscaping is sprinkled on a continuous routine will advertise the healthy and balanced growth that property owners and company owner desire. If you're not obtaining adequate water stress, have broken sprinkler heads, areas that aren't functioning or any type of other problem with your lawn sprinkler, simply offer us a call at ( 601) 829-1309 and we'll obtain it in functioning order.
The most essential factor when developing a brand-new irrigation system is the dimension of the entire residential property, then the shape of the residential property. Likewise the sorts of plants, trees, hedges and flower you have in your landscaping can additionally affect the design of your brand-new watering system. Here are some of the different sorts of watering system elements that we generally mount: are utilized to cover to a 15 foot distance or even more.
Sprinkler System Installation Walnut, CA
The greatest benefit to a pop up watering system is the look, or lack thereof. This system is buried under ground and is seen just when in use. are really similar to the pop-up sprayer, however they have a solid stream that revolves and are utilized to cover a larger area.
sprinklers are usually put in blossom beds and spray a fine haze under low pressure. is very similar to the haze watering, but is best used in landscape design beds near focal plants. Leak watering works by dripping water down towards the plant's roots. This kind of irrigation should be placed near the plant because there isn't any spray.
Commercial Irrigation Repair Walnut, CA
Soaker watering (or soaker hoses) are hidden in your landscape beds and directed between your plants, after that attaching to your standard spigot. When switched on, water will certainly extend with the countless small holes throughout the tube, soaking the ground where your plant's roots expand. When you work with Atmosphere Landscape for your brand-new landscaping design and setup, we always suggest an irrigation system if your do not have one already.
Matteo's Landscaping takes note of information and deal complete, prompt and courteous watering style, installment, maintenance solutions that brings an equipment and labor service warranties. Call us today to find out more on our watering setup and upkeep services at or finish the Call United States form -.
Garden Irrigation is commemorating over half a century as the sector leader in the setup and service of underground yard sprinkler systems. Supplying the very best irrigation solutions in Central New Jacket is our top priority. We provide hassle-free sprinkler estimate consultations and our call-ahead solution to reduce any kind of lost time when you need your system serviced.
A Yard Irrigation grass sprinkler system is developed and developed to endure the test of time. We have actually some systems installed from the 1970s still working today!
Commercial Irrigation Services Walnut, CA
Prepare your irrigation system for the year's toughest climate with our winterization solutions. Our very trained service technicians will blow the water out of the system, which assists avoid rupturing icy pipes and broke components. In the springtime, we'll start up your irrigation system and totally free it of particles and excess air, activate your sprinklers, and examine for efficiency.
Preserving a lavish, environment-friendly landscape can be difficult. Whether it's the front yard of your home or the extensive residential or commercial property bordering your company, it takes a fair bit of job and typically a great deal of water to make it look its finest. The team at Conserva Watering of Charleston is right here to take that concern off your shoulders.
Sprinkler Installers Walnut, CA

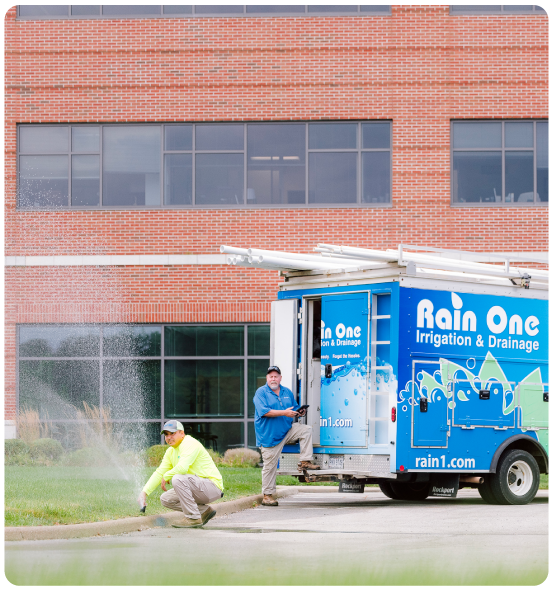
Pacific Green Landscape Maintenance
Address: 6530 Whittier Ave Whittier, CA 90601-3919Phone: (562) 203-3567
Email: pacificgreencompany@gmail.com
Pacific Green Landscape Maintenance
Our North Charleston irrigation group can assist you reduce your water usage by up to 60 %. Our company was started on the idea of conserving water and is your one-stop-shop for residential and business watering. If you are in the market for a brand-new sprinkler system, Conserva Watering of Charleston is the firm to turn to.
Lawn Irrigation Companies Walnut, CALawn Irrigation Companies Walnut, CA
Commercial Irrigation Repair Walnut, CA
Irrigation Maintenance Walnut, CA
Lawn Sprinkler Companies Walnut, CA
Lawn Sprinkler Installers Walnut, CA
Irrigation System Maintenance Walnut, CA
Landscape Irrigation Repair Walnut, CA
Lawn Sprinkler Companies Walnut, CA
Commercial Irrigation Services Walnut, CA
Irrigation Systems Installers Walnut, CA
Sprinkler Systems Installers Walnut, CA
Commercial Irrigation Services Walnut, CA
Sprinkler System Installation Walnut, CA
Sprinkler Installers Walnut, CA
Irrigation Service Walnut, CA
Irrigation System Repair Service Walnut, CA
Irrigation System Repair Service Walnut, CA
Landscape Irrigation Repair Walnut, CA
Irrigation System Maintenance Walnut, CA
Residential Irrigation Repair Walnut, CA
Irrigation Repair Services Walnut, CA
Irrigation System Repair Service Walnut, CA
Sprinkler System Installation Walnut, CA
Installing A Sprinkler System Walnut, CA
Lawn Irrigation Services Walnut, CA
Sprinkler System Repairs Walnut, CA
Lawn Sprinkler Repair Walnut, CA
Lawn Sprinkler Installers Walnut, CA
Sprinkler System Repairs Walnut, CA
Lawn Irrigation Services Walnut, CA
Irrigation System Maintenance Walnut, CA
Irrigation Installers Walnut, CA
Residential Irrigation Repair Walnut, CA
Commercial Irrigation Repair Walnut, CA
Lawn Irrigation Services Walnut, CA
Lawn Sprinkler Repair Walnut, CA
Lawn Sprinkler Companies Walnut, CA
Commercial Irrigation Services Walnut, CA
Irrigation System Installers Walnut, CA
Lawn Irrigation Companies Walnut, CA
Irrigation Repair Services Walnut, CA
Sprinkler System Installer Walnut, CA
Lawn Sprinkler Installers Walnut, CA
Lawn Irrigation Companies Walnut, CA
Lawn Sprinkler Installers Walnut, CA
Sprinkler Installers Walnut, CA
Sprinkler Installation Companies Walnut, CA
Irrigation Maintenance Walnut, CA
Irrigation System Installers Walnut, CA
Commercial Irrigation Services Walnut, CA
Lawn Irrigation Companies Walnut, CA
Irrigation System Repair Service Walnut, CA
Lawn Sprinkler Installers Walnut, CA
Lawn Sprinkler Service Walnut, CA
Lawn Irrigation System Walnut, CA
Sprinkler Installers Walnut, CA
Lawn Sprinkler Repair Walnut, CA
Sprinkler Systems Installers Walnut, CA
Sprinkler Systems Installers Walnut, CA
Irrigation Service Walnut, CA
Irrigation Service Walnut, CA
Lawn Irrigation System Walnut, CA
Find A Good Seo Services Walnut, CA
Close By Seo Services Near Me Walnut, CA
Pacific Green Landscape Maintenance
Table of Contents
- – Irrigation System Maintenance Walnut, CA
- – Pacific Green Landscape Maintenance
- – Irrigation Installer Walnut, CA
- – Lawn Sprinkler Companies Walnut, CA
- – Commercial Irrigation Services Walnut, CA
- – Lawn Sprinkler Companies Walnut, CA
- – Lawn Sprinkler Service Walnut, CA
- – Sprinkler System Installer Walnut, CA
- – Sprinkler System Installation Walnut, CA
- – Commercial Irrigation Repair Walnut, CA
- – Commercial Irrigation Services Walnut, CA
- – Sprinkler Installers Walnut, CA
- – Pacific Green Landscape Maintenance
Latest Posts
Fountain Valley Health Insurance For Seniors Without Medicare
Evaporative Cooler Installation Tujunga
Studio City Evaporative Cooler Repair
More
Latest Posts
Fountain Valley Health Insurance For Seniors Without Medicare
Evaporative Cooler Installation Tujunga
Studio City Evaporative Cooler Repair