All Categories
Featured
Table of Contents
- – Rv Carpet Replacement Riverside, CA
- – OCRV Center
- – Remodeling Rv Riverside, CA
- – Rv Floor Replacement Riverside, CA
- – Rv Replacement Furniture Riverside, CA
- – Rv Sofa Beds Riverside, CA
- – Awnings For Rv Riverside, CA
- – Rv Floor Replacement Riverside, CA
- – Rv Dinette Table Riverside, CA
- – Rv Interior Furniture Riverside, CA
- – Awning Installation Riverside, CA
- – Rv Dining Table Riverside, CA
- – OCRV Center
Rv Carpet Replacement Riverside, CA
Much like the home windows in your vehicle or home, there are a few various kinds. Maybe you want a window in your door to make sure that you can allow the sunlight? Inspect! The RV Access Door Obscure Glass Home window is perfect for that, with the addition that you can have your personal privacy while still allowing the light.
And if you desire your home windows to be tinted, we can help you there. So you can have the sight, the sunlight, and the breeze, all while having the personal privacy you desire. I make sure you understand all that a home window can do. It lets in light, it shuts out rain, lets in a breeze, stays out pests.
Without the home windows to allow in the light to inform you whether it's night or day, you can obtain all kinds of mixed up, perhaps even miss out on a large event. Or imagine you're having a picnic with your family and you run inside to get some even more hotdogs. Without a window, you would not be able to see that your daughter is obtaining terribly close to the fire and no one else has actually seen.
Remodeling Rv Riverside, CA
The sun is a terrific designing tool to utilize, brightening room and aesthetically expanding it. All the very best decorators know how much of an effect illumination can have. Whether you're using it to draw attention to an amazing item of art work or add heat to an entire area, illumination makes all the difference in an area.
If you have older windows that require changing, the process for installing the brand-new windows isn't as very easy as it looks. You need to eliminate the internal structure of the old home window by eliminating the screws. After that, you need to remove the external structure of the home window by pressing it out of the home window location.
Next off, eliminate any one of the old sealants from the area with a putty knife. As soon as that is done, tidy the location with a suitable cleaner. When your location is clean and without debris, inspect the structural components of the home window opening. If there is anything that requires repaired (rusted staples, for example), make certain you fix them before mounting the brand-new window.

Once again, see to it you are utilizing the aid of one more individual to keep every little thing straight and also and avoid the home window from dropping. As soon as the outer frame and the glass framework remain in location, safeguard them by placing and securing the internal framework on the inside of the home window location.
Rv Floor Replacement Riverside, CA
We believe in providing the greatest value, high quality, and choice (Rv Interior Remodel Riverside). Plus, we want you to enjoy your acquisition! In case you desire to send a product back to us, you might return most unused items for a reimbursement or exchange, minus shipping, within 90 days from the day of purchase unless kept in mind below under exceptions and exemptions
For web orders, please get in touch with our consumer service team(1-888-626-7576) to ensure your return or exchange is recorded and any type of prospective questions have been addressed. A return consent will be provided, and, in every situation, we'll begin to maintain an eye out for your return. For web orders returned in-store, please take the product in initial product packaging, together with the invoice to any type of Camping Globe retail locations for a refund or exchange.
Rv Replacement Furniture Riverside, CA
Reimbursements for internet orders released in-store are able to be refunded to a PRESENT CARD or MAILED CHECK ONLY; some exemptions might apply. For retail acquisitions returned with a receipt, please return the unused and unopened item, with the original sales receipt, for a full reimbursement or exchange. All returns with a present invoice will receive a store credit history for the quantity of the thing at the time of purchase.
Correct ID will certainly be needed in the kind of a valid, state-issued motorist's license or state ID card. We reserve the right to limit or decline returns without an invoice. Excellent Sam Members that have preserved a continual energetic subscription condition might return any type of unused and unopened product, acquired on Feb.
When it pertains to motor home travel, having the right windows can make all the difference. Whether you're trying to find better insulation, enhanced ventilation, or simply a better sight, there are a couple of key factors to take into consideration when picking the most effective recreational vehicle window for your car. Here are 5 ideas to aid you make an informed decision and appreciate your travels to the max.
Rv Sofa Beds Riverside, CA
Fixed home windows are fixed and can not be opened up, while sliding home windows can be opened horizontally or vertically. Awning windows are pivoted at the top and open external, giving superb air flow.
Try to find home windows that are made from toughened up glass, which is stronger and extra resistant to breakage than routine glass. Furthermore, the frame should be made from strong products like aluminum or vinyl, and ought to be created to avoid leaks and drafts. Purchasing a top notch motor home home window will certainly make certain that it lasts for years and supplies dependable efficiency on your journeys.
The window ought to fit comfortably right into the area supplied, without any type of gaps or areas that can allow drafts or leaks. Step the opening thoroughly and choose a window that matches the dimensions. Additionally, consider the shape of the window and just how it will fit with the general style of your motor home.
Awnings For Rv Riverside, CA
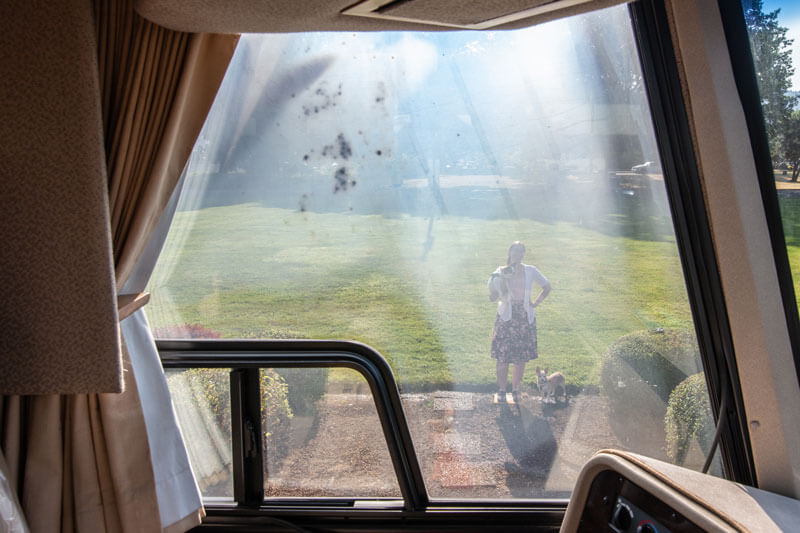
Your RV's home windows are the secret to satisfying camping, allowing you see all the views of the road and your destinations. If you're driving a motorhome, the windscreen is the most crucial window on the entire recreational vehicle. No matter which sort of RV you possess, your windows are a fundamental part of camping.

Older RVs were built with less innovative window systems, so there is deterioration that may be evident. Not to fret, you can see things clearly again by changing your recreational vehicle windows! Some motor home home window issues may be fixed when you deep tidy your recreational vehicle, yet particular concerns like haze, scrapes, or concerns with the covering of the window might suggest it's time to change your motor home home windows.
There are cracks, deep scratches, or chips in the home windows. Wind or water gets in the rig from around the home windows, even when the home windows are shut. When changing your RV home windows, you're able to pick the right window for your RV and your needs.
Rv Floor Replacement Riverside, CA
There are additionally choices such as translucent glass, pebbled home windows, and tinted motor home windows. Your design, protection, and home window utilize requirements will assist identify which sort of recreational vehicle home window you pick. Your motor home's home window frames incorporate the exterior and interior elements of your RV, and they should be properly installed to make certain that the sidewall's seal stays watertight.
The most effective method to ensure that your RV window replacements are installed correctly is to leave it to the specialists. Our RV service specialists can replace any kind of windows and glass on your RV, consisting of the windscreen, side home windows, and even the a lot more complicated recreational vehicle door window replacement. Door windows, if not set up properly, can rattle when you're utilizing the RV door, so leave that repair service to our specialists at Lazydays RV.
Rv Dinette Table Riverside, CA
These home windows open outside with a crank mechanism, enabling for ventilation while minimizing rain entrance. Usually bigger windows that do not open, providing unobstructed views and light if geared up.
Offers a water tight seal around the home window. While Recreational vehicle windows vary from household home windows, they require routine focus and maintenance to avoid concerns like water leaks.
Rv Interior Furniture Riverside, CA
Ensure to inspect for room-by-room display elimination as needed. To guarantee the durability and performance of your motor home windows, consider the complying with ideas: Take a look at the location where the home window fulfills the wall surface for any kind of gaps or spaces. Clean the location completely before using silicone sealant. In severe cases, you might need to eliminate the home window and re-install it using putty or foam seal.
We motivate users to confirm the materials and speak with their supplier or Keystone motor home for the most current info. If you have any type of inquiries or need additional explanation, please do not hesitate to contact your dealership or reach out to Keystone recreational vehicle straight.
These are the devices we needed for our camper home window replacement. Depending on your Motor home, you might or may not require all of these tools for your task.
No matter where you purchase your new Motor home window, you'll need to offer accurate measurements. Allow's damage down our process for measuring a RV window for replacement.
Awning Installation Riverside, CA
Do not put any type of external pressure on the home window while taking your dimensions, or it might come loose and loss. For extra safety, you might wish to have a helper on a ladder outside, holding the window in location while you measure. Meticulously remove the structure of your old home window so that you can measure the opening (NOT the window itself).
For our rectangular home window, we required to take just 4 dimensions. Be aware that we're measuring the opening itself. Making use of a measuring tape, take careful note of the size and height of the opening. It's a great concept to take dimensions at numerous factors so you have a concept of how cleanly the home window opening was cut.
Rv Dining Table Riverside, CA
Next, gauge the thickness of the wall surface (depth of the window), from the exterior wall surface to the indoor wall surface area. For this dimension, use your leader (with measurements that run right throughout). Place the ruler right into the wall surface until it touches the beyond the window structure.
Dimensions of the old home window and the window opening are usually different. Window producers use filler strips to maintain the home window degree and snug.
Procedure two times, cut once? Take your time to obtain an exact dimension, and double-check it by measuring a 2nd time. Exact measurements are essential to RV home window replacement. You do not desire to freely determine and assemble or down. Always determine to the local 1/16th of an inch. Take a close consider your tape measure and make sure you understand which are the 1/16th-inch measurements.
OCRV Center
Address: 23281 La Palma Ave Yorba Linda, CA 92887Phone: (714) 909-1444
Email: art@ocrvcenter.com
OCRV Center
The window producers are the very best authorities on mounting their products. The maker of your new RV home window has most likely consisted of handy guidelines or tips to make the setup simpler. These kinds of instructions are often consisted of on suppliers' internet sites. If your brand-new window featured instructions in the bundle, make sure to maintain those helpful, as they may have outlined step-by-step directions in a consisted of brochure.
Rv Sofa Beds Riverside, CARv Couch Riverside, CA
Rv Replacement Awnings Riverside, CA
Awnings For Rv Riverside, CA
Rv Sofa Beds Riverside, CA
Rv Dining Table Riverside, CA
Rv Couch Riverside, CA
Rv Chairs Riverside, CA
Rv Sofas Riverside, CA
Rv Sofas Riverside, CA
Rv Couch Bed Riverside, CA
Replacement Rv Refrigerator Riverside, CA
Remodeling Rv Riverside, CA
Rv Dining Table Riverside, CA
Rv Floor Replacement Riverside, CA
Rv Dining Table Riverside, CA
Replacement Windows For Rv Riverside, CA
Remodeling Rv Riverside, CA
Rv Upholstery Riverside, CA
Rv Dinette Table Riverside, CA
Rv Replacement Furniture Riverside, CA
Rv Interior Remodel Riverside, CA
Rv Dinette Table Riverside, CA
Rv Dinette Table Riverside, CA
Rv Chairs Riverside, CA
Rv Floor Replacement Riverside, CA
Rv Sofas Riverside, CA
Awnings For Rv Riverside, CA
Rv Couch Riverside, CA
Rv Floor Replacement Riverside, CA
Rv Interior Furniture Riverside, CA
Replacement Windows For Rv Riverside, CA
Rv Upholstery Riverside, CA
Replacement Rv Refrigerator Riverside, CA
Rv Refrigerator Replacement Riverside, CA
Rv Dinette Table Riverside, CA
Replacement Rv Refrigerator Riverside, CA
Rv Sofa Sleeper Riverside, CA
Rv Dinette Table Riverside, CA
Rv Dinette Booth Riverside, CA
Rv Dinette Booth Riverside, CA
Rv Dinette Table Riverside, CA
Rv Couch Riverside, CA
Rv Carpet Replacement Riverside, CA
Rv Dining Table Riverside, CA
Rv Sofa Sleeper Riverside, CA
Rv Replacement Furniture Riverside, CA
Replace Rv Flooring Riverside, CA
Rv Carpet Replacement Riverside, CA
Rv Sofa Sleeper Riverside, CA
Replacement Windows For Campers Riverside, CA
Replacement Windows For Rv Riverside, CA
Rv Dinette Booth Riverside, CA
Rv Interior Remodel Riverside, CA
Rv Upholstery Riverside, CA
Rv Replacement Awnings Riverside, CA
Rv Chairs Riverside, CA
Rv Floor Replacement Riverside, CA
Replacement Windows For Rv Riverside, CA
Rv Chairs Riverside, CA
Rv Floor Replacement Riverside, CA
Rv Restoration Companies Riverside, CA
Rv Restoration Companies Riverside, CA
Replacement Rv Refrigerator Riverside, CA
Rv Interior Furniture Riverside, CA
Replacement Windows For Campers Riverside, CA
Rv Chairs Riverside, CA
Rv Sofa Sleeper Riverside, CA
Rv Microwave Replacement Riverside, CA
Rv Upholstery Riverside, CA
Rv Restoration Companies Riverside, CA
Rv Sofa Beds Riverside, CA
Remodeling Rv Riverside, CA
Rv Dinette Table Riverside, CA
Rv Microwave Replacement Riverside, CA
Rv Interior Remodel Riverside, CA
Awning Installation Riverside, CA
Rv Refrigerator Replacement Riverside, CA
Companies Near Me Seo Company Near Me Riverside, CA
Near You Seo Companies Near Me Riverside, CA
OCRV Center
Table of Contents
- – Rv Carpet Replacement Riverside, CA
- – OCRV Center
- – Remodeling Rv Riverside, CA
- – Rv Floor Replacement Riverside, CA
- – Rv Replacement Furniture Riverside, CA
- – Rv Sofa Beds Riverside, CA
- – Awnings For Rv Riverside, CA
- – Rv Floor Replacement Riverside, CA
- – Rv Dinette Table Riverside, CA
- – Rv Interior Furniture Riverside, CA
- – Awning Installation Riverside, CA
- – Rv Dining Table Riverside, CA
- – OCRV Center
Latest Posts
Senior Insurance Plans Garden Grove
Insurance Senior Citizens Rancho Santa Margarita
Fullerton Best Individual Health Insurance Plans
More
Latest Posts
Senior Insurance Plans Garden Grove
Insurance Senior Citizens Rancho Santa Margarita
Fullerton Best Individual Health Insurance Plans