All Categories
Featured
Table of Contents
- – Repair Rv Roof Leak Anaheim, CA
- – OCRV Center
- – Rv Roof Repair Service Near Me Anaheim, CA
- – Resealing Rv Roof Anaheim, CA
- – Rv Roof Maintenance Anaheim, CA
- – Repair Rv Roof Leak Anaheim, CA
- – Rv Roof Maintenance Anaheim, CA
- – Rv Trailer Roof Repair Anaheim, CA
- – Rv Roof Repair Fiberglass Anaheim, CA
- – Rv Roof Replacement Anaheim, CA
- – Rv Roof Maintenance Anaheim, CA
- – Rubber Roof Installation Anaheim, CA
- – Rubber Roof For Rv Anaheim, CA
- – Rv Roof Repair Anaheim, CA
- – Rv Roof Repair Near Me Anaheim, CA
- – Rv Roof Repair Service Near Me Anaheim, CA
- – Motorhome Roof Replacement Anaheim, CA
- – OCRV Center
Repair Rv Roof Leak Anaheim, CA
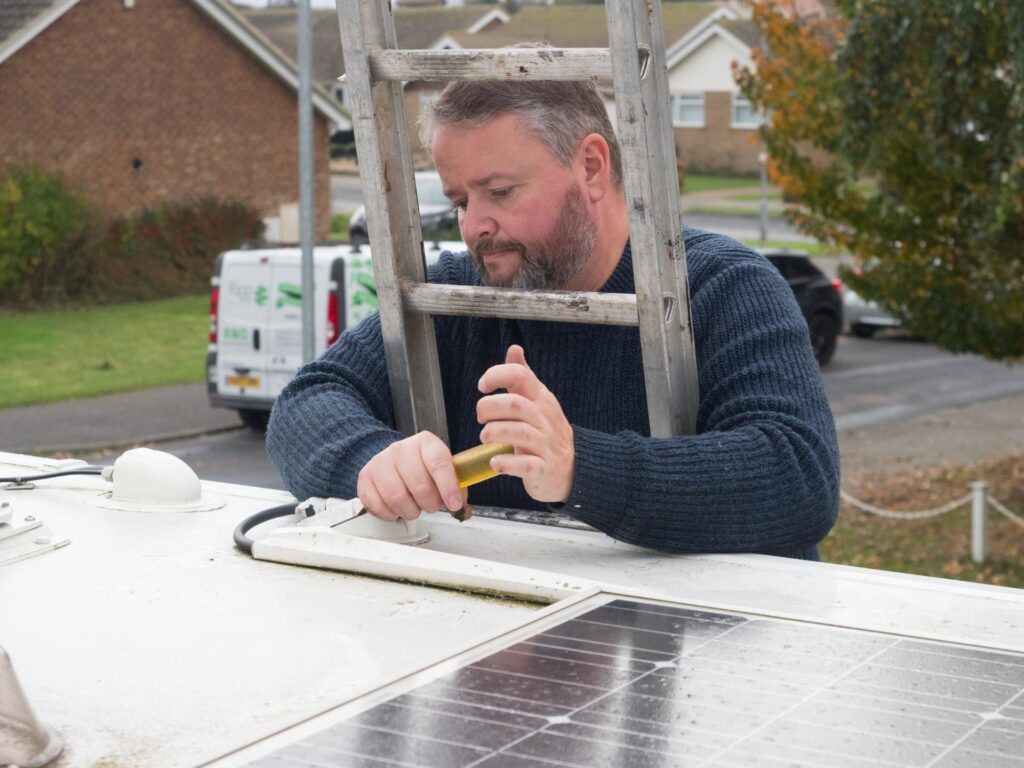
While you're cleansing, scuff off any kind of particles or old roof product, but beware while you do this as you might easily extend a tear, or also punch a hole via the roofing. You need to after that dry out the roof covering as best as you can. Keep In Mind: Rubber RV roofing systems can be extremely slippery when damp.
After the roofing is clean, you are mosting likely to intend to examine the joints for holes, fractures or peeling off, so you can reseal any place necessary. You'll desire to make a point of resealing all joints once a year whether or not they show indications of wear.
Rv Roof Repair Service Near Me Anaheim, CA
When it involves selecting the most effective motor home roof covering sealer, you'll wish to take into consideration whether you are repairing a tear, resealing a seam, or securing the entire roofing system. The sort of roofing system is also vital to bear in mind, as recreational vehicle roofing systems can be made from either EPDM (Ethylene Propylene Diene Monomer) and TPO (Thermal Polyolefin) and you need the product you use to be compatible with your roofing type.
Dicor Self-Leveling Lap Sealer is a great selection for reviewing old roofing system seals. It can be used for spot sealing or to reseal every joint on the motor home roof covering. Just clean the area well and use with a caulk weapon. The things will level itself out, so do not stress over that part.
Resealing Rv Roof Anaheim, CA
This primes and layers the roofing system to produce a charming, safety finishing that'll last for years. Lastly, there is the Dicor TPO Roof Covering Coating System. Comparable to the EPDM system noted above, this layer product will cover your TPO roof and assist it last another one decade. Prior To EPDM and TPO, metal was the material of choice for motor home roofing systems.
The previously mentioned EternaBond is still king when it comes to fixing little problems on a steel roof. It likewise works well for securing seams. RV steel roofings do require to be totally resealed periodically. Home roof covering coverings will certainly seal a steel roofing just great, however the very best item by far, for metal roofs, is Dicor Metal Recreational Vehicle Roofing System Finishing.
Rv Roof Maintenance Anaheim, CA
Ensure to reseal whenever necessary and challenge resealing every one of the joints as soon as every twelve month approximately. Dicor Self-Leveling Lap Sealer works well for this job. If your fiberglass roof covering requires to be coated, Dicor Fiberglass Roof Covering Covering is a good pick. First, you'll need to eliminate the present roofing.
Do this in small pieces the whole time the roofing, reducing openings in the rubber roof covering for any kind of feature that will certainly return right into the roofing. Change your roof covering's followers, skylights, and AC device. Seal each joint with the lap sealer we mentioned earlier. You'll additionally wish to use lap sealant to the edges of the roof.
My Motor home roofing that needs to be replaced! If you're like me and have more time than cash, after that probably your finest option is to acquire an old RV and fix it up.
Repair Rv Roof Leak Anaheim, CA
I get it. I purchased my RV over a year ago and didn't have the intestines to begin tackling this job till today. I acquired this 1993 Jamboree for $5000.
I have actually never ever functioned on a Motor home before and I have to confess, I'm frightened. Ideally if you're thinking about doing this yourself, complying with along on my RV roofing replacement project will certainly offer you the guts to dive in! The devices I used today.
Rv Roof Maintenance Anaheim, CA
That seemed to be my most inexpensive alternative.
I figured I would rather have it semi-portable so I selected the cover, plus this allows me to readjust the height backwards and forwards when I require to. Certainly the most inexpensive alternative of all would certainly be to just toss an excellent tarp over the top of your motor home for rainy days and just service sunny days! Initially I elevated the legs with 1 1/2 PVC pipe that fit inside the legs and after that I attached a pipe clamp around the PVC pipe to hold up the canopy legs.
This is still a little saggy. I possibly should have forked out for some inflexible steel pipe from the start.
Fractures in the EPDM roofing at side of camper. An old patch job on the recreational vehicle rubber roofing. Tons of caulk piled over old trouble locations. As you can see, this roofing system has actually had a whole lot of issues for many years. Looking from the within the camper there have clearly been leaks in lots of areas of the roof.
Rv Trailer Roof Repair Anaheim, CA
On the base is the original EPDM rubber roofing layer - Motorhome Roof Replacement Anaheim. I understand it's EPDM rubber and not TPO rubber since of the black support. On top of my EPDM roofing is a slim Motor home roof finish that was applied later.
I simply left the roofing finishing adhered to the EPDM roof and pulled them up with each other. (You do not need to peel them up independently.) Starting to peel roofing system layer. Peeling off up section of the bottom layer of rubber. This shows that the original RV roof was EPDM as a result of the black backing.
Rv Roof Repair Fiberglass Anaheim, CA
I reduced lines with an energy knife around components. All rubber roofing removed from camper. This action went rather quickly. There was an adhesive under the lower layer of rubber that was still rather well stuck in numerous locations, but with an excellent little pressure it peeled up cleanly.
Currently I might see all the harmed plywood roofing system outdoor decking beneath. DIRECTS! You may not desire to peel off the rubber! I selected to remove the rubber before eliminating components simply so I can see what I was dealing with. But I need to alert you, the old adhesive was still sticky, and a pain to stroll on.
If you assume you'll be conserving the roofing outdoor decking plywood (not changing it), after that you might save on your own some cleanup problem by eliminating the fixtures initially and then peeling off up the rubber! Information of water damages on camper roofing. More water damaged areas on motor home roof covering decking. There was nothing truly dreadful that made me feel like I was going to fall via, however definitely a great deal of damage and I was obtaining the feeling I would certainly be replacing a whole lot of the roof covering decking plywood.
Rv Roof Replacement Anaheim, CA
I went for the easiest one first, a vent cap from a kitchen area sink pipes air vent pipe. There is no other way around this, you simply have to start excavating till you expose the screw heads.
Loosening the screws in air vent cap. The screws on this air vent cap were hex-head steel screws so I made use of a little outlet driver to remove them. Some appeared clean. Others were rusted and I needed to utilize a vice-grip pliers to get hold of the heads and turn them gradually.
I found an old wasp nest inside the air vent cover. This is a view I'll possibly need to obtain used to, discovering the remains of animal habitation in every space and cranny. I invest a dreadful great deal of my time developing good wild animals environment in my backyard so I don't get annoyed when an animal picks to set up home in my motor home.
Rv Roof Maintenance Anaheim, CA
Fortunately nobody was home in this old nest so I simply tossed it. You should attempt not to harm these pieces (like air vent covers and caps) as you're scraping off the old caulk and sealer simply in situation you need to use them once more.
My roofing system vent additionally had an air vent cover over it. Beginning on the roofing vent. Hardware revealed on roofing air vent cap, the initial nut came off clean.
Rubber Roof Installation Anaheim, CA
Screw is rotating. The fasteners on this motor home roof covering air vent cover were nuts on tiny screws. The initial one came off great with an expansion socket kit. The 2nd one simply began rotating, implying the screw was not repaired in position however turning in addition to the nut. Disappointment. A peek at the hardware holding down the roofing air vent cover.
I really did not have any type of excellent way to hold the screw in position so instead I opted to saw with the bolts with a reciprocating saw. Sawing via screws on roof air vent cover. I utilized a cordless reciprocating saw with a metal-cutting blade but it was challenging to get the blade level enough to reach the bolts so close to the roofing deck.
Rubber Roof For Rv Anaheim, CA
Bending the blade a little bit to reach near the roof deck. When I had actually sawn through the staying 3 bolts, I pried up the cover. The brackets that were holding the cover in place. Cover gotten rid of from roof air vent. I loosened the braces from the flange of the vent fan itself.
The majority of were so old and rusted that they sheared off when I unscrewed after that with a great deal of force. Loosening the brackets that held the air vent cover in position. I scraped a lot more caulk and roof sealer off the flange of the roof vent itself. I quickly uncovered there disappeared screws or equipment quieting so I surrendered on the scratching and went inside the motor home After scuffing the caulk and sealant from flange of roof air vent, no even more screws! Loosening the inside cover plate of roofing air vent follower in motor home shower room.
Rv Roof Repair Anaheim, CA
A pair sheared off with a great deal of force, yet two wouldn't move. I had to pierce out the screw heads. I chose a drill bit close to the dimension of the shaft of the screws that I had already taken out and began boring. Selecting a drill little bit for piercing out a screw head.
Safety glasses advised. So I drilled out the heads, one popped off and the other I was obtaining irritated with and gave it a pull before it was drilled with. Rather of standing out off the screw head, the plastic simply thawed away around the hot screw head. Whoops. Hope I do not have to reuse this cover.
Rv Roof Repair Near Me Anaheim, CA
When the braces were out I went back up top to pry out the the roofing air vent. There are two cords running to the roof covering vent (a black warm cable and a white neutral wire) that you'll require to clip to remove the old air vent.
These are the wires attaching the roof covering airing vent follower. I clipped them simply above heaven splice joints. Roofing air vent gotten rid of and cleaned up. After clipping the wire and removing the air vent, I cleaned up any continuing to be goop and got my first excellent consider the roofing system frame. It's metal! 1 1/2 inches thick.
Some RV roof coverings are mounted with timber, others have steel framework. I had no idea what remained in my camper up until this point. Not as well satisfied regarding the amount of corrosion on it, however ideally it is still structurally sound! I scratched off some corrosion and made a huge mess inside the washroom.
My last goal of the day was to obtain the refrigerator vent cover off. I saw Motor home sealer balls at 4 factors on the cover so thought there have to be screws under them.
Rv Roof Repair Service Near Me Anaheim, CA
Revealing the screws in the refrigerator air vent cap. Removing old motor home roofing system layer on top of refrigerator air vent cap I likewise discovered that there was a layer of motor home roof covering finishing over the air vent cap. These finishes are painted on with a brush so plainly whoever did this coating simply blobbed in on top of everything.
Raising off the cover of the fridge roof air vent. Cutting away much more rubber and scraping off Motor home roof sealer and old caulk. Scratching lap sealer and caulk from screw heads.
Prying off the fridge roofing system vent after all screws are gotten rid of. Virtually every screw was in great sufficient problem to get rid of with a socket motorist, but a couple were as well corroded and required to be twisted out with vice grip pliers.
Motorhome Roof Replacement Anaheim, CA
I peeled off the remaining rubber roofing from under the flange and then scraped off the old putty underneath. Scraping off the old putty from the flange of the fridge roof covering vent.
Class C Rv Roof Repair Anaheim, CARv Fiberglass Roof Repair Anaheim, CA
Best Rv Roof Repair Anaheim, CA
Rv Roof Repair Anaheim, CA
Rubber Roof For Camper Anaheim, CA
Rv Fiberglass Roof Repair Anaheim, CA
Rv Fiberglass Roof Repair Anaheim, CA
Rv Roof Repair Near Me Anaheim, CA
Rv Roof Leak Repair Near Me Anaheim, CA
Repair Rv Roof Leak Anaheim, CA
Resealing Rv Roof Anaheim, CA
Repair Rv Roof Anaheim, CA
Rubber Roof Installation Anaheim, CA
Rv Roof Repair Service Near Me Anaheim, CA
Rv Trailer Rubber Roof Repair Anaheim, CA
Rv Rubber Roof Replacement Anaheim, CA
Rv Trailer Roof Repair Anaheim, CA
Rv Roof Repair Fiberglass Anaheim, CA
Rv Roof Repair Anaheim, CA
Rv Slide Out Roof Repair Anaheim, CA
Motorhome Roof Replacement Anaheim, CA
Rubber Roofing For Campers Anaheim, CA
Rv Rubber Roof Replacement Cost Anaheim, CA
Rubber Roof For Rv Anaheim, CA
Rv Trailer Rubber Roof Repair Anaheim, CA
Motorhome Roof Replacement Anaheim, CA
Roof Repair For Rv Anaheim, CA
Replace Rv Roof Anaheim, CA
Rv Roof Repair Anaheim, CA
Rv Fiberglass Roof Repair Anaheim, CA
Repair Rv Roof Leak Anaheim, CA
Rv Roof Leak Repair Anaheim, CA
Rv Rubber Roof Replacement Anaheim, CA
Rv Fiberglass Roof Repair Anaheim, CA
Rv Roof Repair Near Me Anaheim, CA
Rv Roof Repair Fiberglass Anaheim, CA
Best Rv Roof Repair Anaheim, CA
Rubber Roofing For Campers Anaheim, CA
Rubber Roof Installation Anaheim, CA
Rv Rubber Roof Repair Anaheim, CA
Rv Roof Maintenance Anaheim, CA
Rubber Roof Installation Anaheim, CA
Rv Roof Leak Repair Near Me Anaheim, CA
Rv Trailer Roof Repair Anaheim, CA
Rubber Roofing For Campers Anaheim, CA
Rv Roof Maintenance Anaheim, CA
Best Rv Roof Repair Anaheim, CA
Rubber Roof For Camper Anaheim, CA
Rv Slide Out Roof Repair Anaheim, CA
Rv Trailer Roof Repair Anaheim, CA
Rv Rubber Roof Repair Anaheim, CA
Replace Rv Roof Anaheim, CA
Resealing Rv Roof Anaheim, CA
Rv Rubber Roof Repair Anaheim, CA
Rv Rubber Roof Repair Anaheim, CA
Rubber Roofing For Rv Anaheim, CA
Rv Roof Maintenance Anaheim, CA
Class C Rv Roof Repair Anaheim, CA
Rv Rubber Roof Replacement Cost Anaheim, CA
Rubber Roofing For Rv Anaheim, CA
Rubber Roof Installation Anaheim, CA
Best Rv Roof Repair Anaheim, CA
Rv Roof Repair Near Me Anaheim, CA
Repair Rv Roof Leak Anaheim, CA
Rubber Roof For Rv Anaheim, CA
Rubber Roofing For Campers Anaheim, CA
Rubber Roof Installation Anaheim, CA
Rv Rubber Roof Replacement Anaheim, CA
Rv Slide Out Roof Repair Anaheim, CA
Best Rv Roof Repair Anaheim, CA
Epdm Rv Roof Repair Anaheim, CA
Rv Rubber Roof Replacement Cost Anaheim, CA
Rubber Roofing For Campers Anaheim, CA
Rv Roof Maintenance Anaheim, CA
Rubber Roof For Camper Anaheim, CA
Rv Roof Leak Repair Anaheim, CA
Rv Roof Repair Near Me Anaheim, CA
Rubber Roof Installation Anaheim, CA
Companies Near Me Seo Plans Anaheim, CA
Close By Seo Pricing Anaheim, CA
OCRV Center
Table of Contents
- – Repair Rv Roof Leak Anaheim, CA
- – OCRV Center
- – Rv Roof Repair Service Near Me Anaheim, CA
- – Resealing Rv Roof Anaheim, CA
- – Rv Roof Maintenance Anaheim, CA
- – Repair Rv Roof Leak Anaheim, CA
- – Rv Roof Maintenance Anaheim, CA
- – Rv Trailer Roof Repair Anaheim, CA
- – Rv Roof Repair Fiberglass Anaheim, CA
- – Rv Roof Replacement Anaheim, CA
- – Rv Roof Maintenance Anaheim, CA
- – Rubber Roof Installation Anaheim, CA
- – Rubber Roof For Rv Anaheim, CA
- – Rv Roof Repair Anaheim, CA
- – Rv Roof Repair Near Me Anaheim, CA
- – Rv Roof Repair Service Near Me Anaheim, CA
- – Motorhome Roof Replacement Anaheim, CA
- – OCRV Center
Latest Posts
Hvac Installation Service Alhambra
Eastvale Web Design And Development Services
Swamp Cooler Pan Repair Los Angeles
More
Latest Posts
Hvac Installation Service Alhambra
Eastvale Web Design And Development Services
Swamp Cooler Pan Repair Los Angeles