All Categories
Featured
Table of Contents
- – Rv Roof Repair Service Near Me Villa Park, CA
- – OCRV Center
- – Rv Roof Maintenance Villa Park, CA
- – Repair Rv Roof Leak Villa Park, CA
- – Rv Roof Repair Fiberglass Villa Park, CA
- – Rv Rubber Roof Replacement Villa Park, CA
- – Rv Roof Repair Villa Park, CA
- – Rubber Roof For Rv Villa Park, CA
- – Rv Roof Leak Repair Villa Park, CA
- – Rv Rubber Roof Maintenance Villa Park, CA
- – Rubber Roofing For Campers Villa Park, CA
- – Rv Roof Repair Near Me Villa Park, CA
- – Rubber Roof Installation Villa Park, CA
- – Rv Roof Repair Villa Park, CA
- – Rv Roof Repair Fiberglass Villa Park, CA
- – OCRV Center
Rv Roof Repair Service Near Me Villa Park, CA
Roof coverings in certain have a whole lot of potential leak locations. A roofing system joint and the location around a screw may call for different roofing sealants.
It permits whatever to bend so is much less most likely to split. Some windows aren't entirely secured, however it's still important to maintain the seals that are called for. The ideal method to is to routinely examine the integrity of your seals. Stroll around your whole recreational vehicle and inspect every location of change or penetration.
Make it a concern to know where you have motor home sealants and what areas are at risk for fractures and other damage. Being acquainted with the area of every one of your sealers makes your sealer check both fast and effective. Doing that detailed check (it can take as little as 15 minutes) two times a year can conserve you from the aggravation and expenditure of a significant water damages repair service.
Rv Roof Maintenance Villa Park, CA
A dripping roofing is possibly the most persistent issue for several Motor homes. Whether it's brought on by dropping branches, freezing water, or a few other source, it seems that water always finds its way into Motor homes. Sadly, water and RVs were not implied to cohabit, and even a small leak can bring about tragic repercussions in your recreational vehicle - Repair Rv Roof Villa Park.
It's all also typical to really feel the drip of a leaking roofing in your Recreational vehicle. Openings and leakages can take place when warmth from the sun creates the roof covering product to warp or soften.
Repair Rv Roof Leak Villa Park, CA
Regardless of how the leak takes place, once water enters your trailer, the issues will actually begin. If your Motor home isn't well-ventilated, the mildew will swiftly spread and take over.
There are various items on the marketplace, from silicone sealants to tar items, and which product you choose will depend upon the roof covering product of your trailer. In basic, the application processes are rather comparable. You'll need to start by preparing the area. Laundry the entire roof covering of your recreational vehicle to remove any type of particles, tree sap, dirt, and various other pollutants.
Mix up a pail of water with a mild cleaning agent (like dishwashing liquid) and use with the brush. Make certain to scrub till you have all particles got rid of. Wash with fresh water and after that squeegee and towel dry. Once the area is tidy and completely dry, situate the issue location. If it's a half-inch vast or less, or split that's shorter than a foot long, you should have the ability to fix the place yourself.
Rv Roof Repair Fiberglass Villa Park, CA
Including this safety barrier will assist stop any kind of future leaks. At the end of the day, roof covering repair service is commonly best left to the experts.
On top of that, they'll be able to diagnose the extent of any damages caused by the leakage prior to you captured. Plus, you'll be able to have the peace of mind knowing the job was done. Bring your leaking motor home by The Outpost motor home and speak to our group of knowledgeable motor home technicians.
Here's a detailed guide I mapped out that I desire someone had given me when I started my Recreational vehicle journey. When it comes to RV upkeep and fixings, the roof should constantly be inspected thoroughly and frequently.
Rv Rubber Roof Replacement Villa Park, CA
Now that your motor home roofing is clean, you're all set to seal! Before getting started, it's important to note that when it comes to Recreational vehicle roof leaks, there isn't a one dimension fits all remedy. Each leakage is unique and relying on its size and area, it might require a details sort of solution.
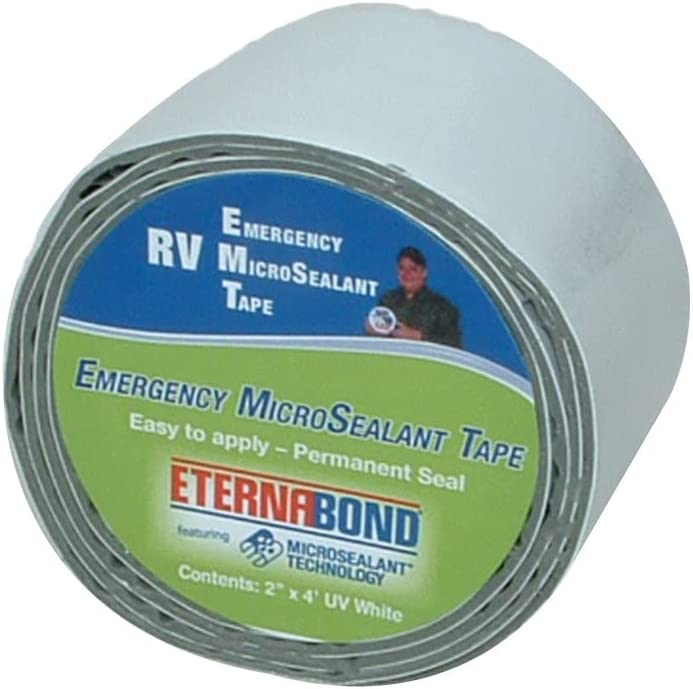
RV Roof Covering Leak Repair: Emergencies Conveniences: Can be applied on a wet surface, making it perfect for a fast repair for smaller sized leakages throughout or after a storm. Pro Suggestion: Make certain to utilize sufficient tape to conceal the opening or space totally, leaving concerning an inch of tape completely around the afflicted area to obtain the finest coverage.
Rv Roof Repair Villa Park, CA
Recreational Vehicle Roof Drip Repair: Targeting Certain Locations Benefits: Great for a longer-term solution. Pro Pointer: Hold the can at a 45-degree angle and apply straight to the trouble location being treated.
Pro Tip: Before utilizing this product, you'll wish to make certain the surface area is completely dry. Make certain to properly check it on a little area initially before using it on a large surface. Several layers are urged! You must permit 24-48 hours for the product to treat prior to each coat.
Usage proper security tools like handwear covers and protective glasses as needed. Use painter's tape and cover the areas you desire to avoid covering, particularly joints and various other moving parts. While no RV roofing lasts forever, appropriate upkeep is important for its durability. With normal examination and the power of The Flex Seal Family of Products, you can aid prolong your recreational vehicle roof's life and keep it going solid as you enjoy the open airs.
Asen is a full time motor home traveler since 2018 and is the owner of the blog site, Camper Life. He likes outdoor camping in nature, angling, and spending time with his household. Striving to give the most important information regarding campers and RVs, he shares everything he discovered throughout the years.
Rubber Roof For Rv Villa Park, CA
Checking the roof involves closely taking a look at the whole surface area, consisting of seams, vents, skylights, and any type of various other roofing system elements. This assists in discovering fractures, slits, tears, or indicators of wear and wear and tear. Repair Rv Roof Villa Park. Roof Covering Cleaning and Prep work: Before conducting repair work, the roofing needs to be thoroughly cleaned up to remove dirt, particles, and any kind of loose or broken material
It is essential to prevent rough cleaner that can cause damage to the roofing product. Repairing Leakages: Water leaks are an usual trouble in recreational vehicle roof coverings and need to be addressed immediately. Finding and fixing leaks generally entails using sealants or roofing patching materials to the influenced areas. Typically made use of sealers consist of silicone-based products or specialized RV roof covering sealers that are compatible with the roof product.
Covering involves utilizing repair service tape, patches, or finishes to cover small areas of damages, while extensive damage might require replacing larger areas of the roofing product. The substitute material ought to match the initial roof material to guarantee correct fit and toughness. Securing and Finish: Using a safety roofing system sealer or finish is vital to improve the durability and water resistance of the roof covering.
Mobile homes (Recreational vehicles) are a prominent way to travel, as they provide the liberty of the open roadway with the conveniences of home. RVs need maintenance simply like any kind of other vehicle, and one of the most usual concerns is a leaking roof covering. In this article, we'll review why recreational vehicle roof leaks are a problem and exactly how to fix them.
Rv Roof Leak Repair Villa Park, CA
Right here are several of the most usual problems that can emerge from a dripping RV roof: The most obvious issue that can occur from a leaking roofing is water damages. Water can seep into the walls, floorings, and ceilings of the motor home, causing mold, mold, and rot. If left unattended, water damage can jeopardize the architectural integrity of the recreational vehicle and create expensive repair services.
If water permeates into the electrical system, it can trigger short circuits, rust, and even fires. Mold and mildew can cause health issue for those who hang around in the recreational vehicle. These can consist of breathing concerns, allergic reactions, and even infections. If you choose to offer your RV, a leaking roofing system will substantially decrease its resale worth.
Since we have actually gone over why motor home roof covering leaks are a trouble, allow's take a look at just how to repair them. There are several steps you can take to repair a leaking recreational vehicle roof, relying on the intensity of the damages. The very first step in fixing a leaking RV roof covering is identifying where the water is coming from.
Try to find any kind of visible cracks, openings, or areas where the sealant is wearing away. Once you've determined the resource of the leak, you'll need to clean and prepare the location for fixing. Eliminate any dirt, particles, or old sealer from the damaged area. Use a cleaner specifically created for RV roofings to make sure that the surface area is tidy and complimentary of impurities.
Rv Rubber Roof Maintenance Villa Park, CA
Utilize a premium sealant that's created for Recreational vehicle roofings and is compatible with the existing sealer. After using the sealer, enable it to dry completely before subjecting it to water.
Inspect inside the motor home for any type of signs of water intrusion, and make any kind of necessary changes to the fixing. The best way to deal with recreational vehicle roof leakages is to stop them from occurring to begin with. Below are some tips to help you stop RV roofing system leaks: Inspect your RV roofing regularly for any kind of indications of damages or wear.
Rubber Roofing For Campers Villa Park, CA
Routinely tidy the roofing with a cleaner especially made for Motor home roof coverings. Motor home roofing system leaks are a common trouble that can trigger significant damage to your lorry.
Nothing ruins a motor home adventure much faster than a leaking roofing system. Water can create significant damages to the interior of your recreational vehicle, and also every one of your possessions. While a recreational vehicle roofing system leak can be a complicated task to tackle, you can quickly repair it yourself with the right devices and products.
Rv Roof Repair Near Me Villa Park, CA
So, don't allow a leaky roof ruin your journey - obtain begun on your recreational vehicle roofing system repair work today! Before you begin your recreational vehicle roof repair work, it is very important to ensure you have the right devices and products. Look no even more than our RV Roofing System Remediation Kits-- they feature all the products that you'll require to obtain this do it yourself weekend break work done right the very first time.
Next, make use of the 100% Silicone Motor Home Roof Layer to seal your whole roofing system. You may intend to make use of a pail with an angled put spout to spread out the finishing in locations that you utilize a roller or a brush on relocate the item around. You'll ideally want 2 thick coats for optimum security.
Rubber Roof Installation Villa Park, CA
Once you've fixed a motor home roofing leakage, it is necessary to take actions to stop future leakages. Among the very best methods to do this is to maintain your roofing system tidy and devoid of particles. Make certain to evaluate your roof routinely for any damages or particles. It's additionally essential to inspect the seals around vents and various other openings.
Last but not least, make certain to inspect the roof after any type of serious weather condition. High winds, hail storm, or heavy rains can all create damage to the roof covering.
Constantly speak with an expert before undertaking roofing system repairs. There are only two kinds of Motor homes: those with roof leaks and those that aren't leaking. Keeping your roofing system clean and correctly maintained will assist. Still, no quantity of maintenance will prevent the possibility of roof leaks. When we bought our toy hauler, I was thrilled to obtain a recreational vehicle with a strong light weight aluminum roofing system since, purportedly, aluminum roofs never ever leak.
Rv Roof Repair Villa Park, CA
It leaks, and about yearly, I locate myself atop a tall ladder on the hunt for the most recent leakage, equipped with a caulk weapon and much disappointment. In truth, recreational vehicle roofing systems lose from the aspects and the rigors of being drawn around the nation at freeway speeds.
Do not be the individual that brings a caulk weapon onto the roof and seals over every seam and penetration before performing a complete evaluation. The very first thing to look for is evident damage in the area over where the leak took place.
Rv Roof Repair Fiberglass Villa Park, CA
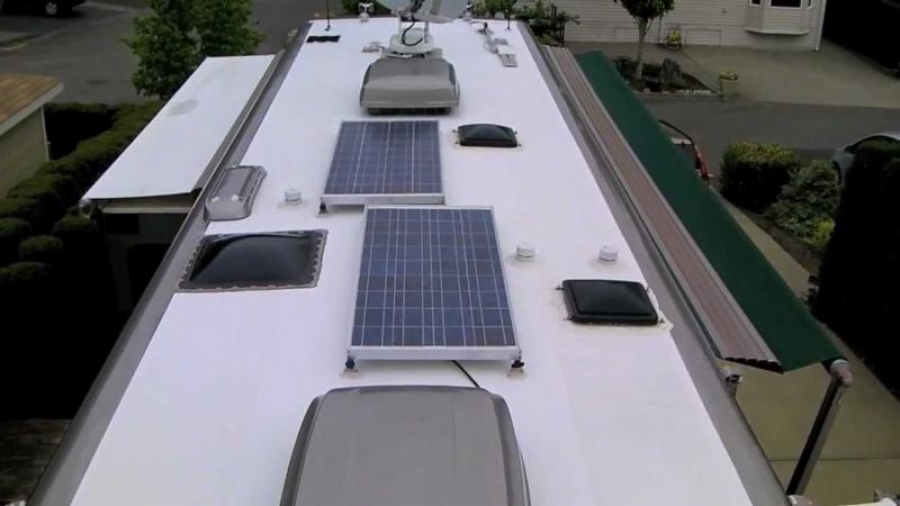
If you don't see anything obviously wrong, concentrate on the seams and infiltrations. The joints are the corners and joints where the primary straight area of your roofing system links to the upright walls on all four sides. The roof penetrations consist of the roof AC units, skylights, pipes air vent pipes, antennas, and exhaust followers.
In enhancement to evaluating the joints, I suggest inspecting any type of marker lights (AKA operating lights) on the Motor home. These are usually small orange or red lights along the top of the outside walls of the RV.
The extent of the damages and scale of essential repairs are the ideal indicators of what to do next. Leaning off of ladders and walking about on shaky Recreational vehicle roofings isn't a fantastic choice for everyone, and it's ideal to hire a professional if you have any uncertainties.
Class C Rv Roof Repair Villa Park, CARv Roof Repair Villa Park, CA
Class C Rv Roof Repair Villa Park, CA
Rv Roof Repair Fiberglass Villa Park, CA
Rubber Roof Installation Villa Park, CA
Rubber Roof Installation Villa Park, CA
Rv Trailer Roof Repair Villa Park, CA
Rubber Roof For Camper Villa Park, CA
Replace Rv Roof Villa Park, CA
Rubber Roofing For Campers Villa Park, CA
Rubber Roof For Camper Villa Park, CA
Rv Fiberglass Roof Repair Villa Park, CA
Rv Roof Repair Villa Park, CA
Repair Rv Roof Leak Villa Park, CA
Rv Roof Maintenance Villa Park, CA
Rv Roof Repair Fiberglass Villa Park, CA
Rv Trailer Rubber Roof Repair Villa Park, CA
Rv Roof Repair Near Me Villa Park, CA
Class C Rv Roof Repair Villa Park, CA
Motorhome Roof Replacement Villa Park, CA
Resealing Rv Roof Villa Park, CA
Rv Fiberglass Roof Repair Villa Park, CA
Rubber Roof For Camper Villa Park, CA
Rv Slide Out Roof Repair Villa Park, CA
Roof Repair For Rv Villa Park, CA
Rv Trailer Rubber Roof Repair Villa Park, CA
Rv Roof Replacement Villa Park, CA
Rv Roof Repair Service Near Me Villa Park, CA
Motorhome Roof Replacement Villa Park, CA
Rv Slide Out Roof Repair Villa Park, CA
Rv Roof Replacement Villa Park, CA
Rubber Roofing For Rv Villa Park, CA
Rv Rubber Roof Replacement Cost Villa Park, CA
Resealing Rv Roof Villa Park, CA
Rubber Roofing For Campers Villa Park, CA
Rubber Roofing For Campers Villa Park, CA
Rv Roof Repair Fiberglass Villa Park, CA
Rubber Roof Installation Villa Park, CA
Rv Trailer Rubber Roof Repair Villa Park, CA
Rubber Roofing For Rv Villa Park, CA
Best Rv Roof Repair Villa Park, CA
Motorhome Roof Replacement Villa Park, CA
Rubber Roofing For Rv Villa Park, CA
Class C Rv Roof Repair Villa Park, CA
Class C Rv Roof Repair Villa Park, CA
Rv Fiberglass Roof Repair Villa Park, CA
Rv Rubber Roof Repair Villa Park, CA
Rubber Roof Installation Villa Park, CA
Rv Roof Leak Repair Villa Park, CA
Rubber Roof Installation Villa Park, CA
Rv Rubber Roof Replacement Cost Villa Park, CA
Best Rv Roof Repair Villa Park, CA
Best Rv Roof Repair Villa Park, CA
Rv Rubber Roof Repair Villa Park, CA
Epdm Rv Roof Repair Villa Park, CA
Motorhome Roof Replacement Villa Park, CA
Rv Roof Leak Repair Villa Park, CA
Rv Slide Out Roof Repair Villa Park, CA
Rubber Roof Installation Villa Park, CA
Rubber Roof Installation Villa Park, CA
Epdm Rv Roof Repair Villa Park, CA
Rv Rubber Roof Repair Villa Park, CA
Rubber Roof Installation Villa Park, CA
Rubber Roofing For Campers Villa Park, CA
Rv Fiberglass Roof Repair Villa Park, CA
Rv Trailer Roof Repair Villa Park, CA
Replace Rv Roof Villa Park, CA
Rv Roof Repair Fiberglass Villa Park, CA
Rv Roof Repair Service Near Me Villa Park, CA
Best Rv Roof Repair Villa Park, CA
Replace Rv Roof Villa Park, CA
Rv Rubber Roof Maintenance Villa Park, CA
Rv Trailer Rubber Roof Repair Villa Park, CA
Rv Fiberglass Roof Repair Villa Park, CA
Rv Roof Replacement Villa Park, CA
Rv Roof Replacement Villa Park, CA
Rubber Roof Installation Villa Park, CA
Rubber Roofing For Rv Villa Park, CA
Find A Good Seo Solutions Villa Park, CA
In My Area Seo Agency Villa Park, CA
OCRV Center
Table of Contents
- – Rv Roof Repair Service Near Me Villa Park, CA
- – OCRV Center
- – Rv Roof Maintenance Villa Park, CA
- – Repair Rv Roof Leak Villa Park, CA
- – Rv Roof Repair Fiberglass Villa Park, CA
- – Rv Rubber Roof Replacement Villa Park, CA
- – Rv Roof Repair Villa Park, CA
- – Rubber Roof For Rv Villa Park, CA
- – Rv Roof Leak Repair Villa Park, CA
- – Rv Rubber Roof Maintenance Villa Park, CA
- – Rubber Roofing For Campers Villa Park, CA
- – Rv Roof Repair Near Me Villa Park, CA
- – Rubber Roof Installation Villa Park, CA
- – Rv Roof Repair Villa Park, CA
- – Rv Roof Repair Fiberglass Villa Park, CA
- – OCRV Center
Latest Posts
Fifth Wheel Repair Near Me Tustin
Mercedes Sprinter Repair Near Me Montclair
Mercedes Benz Sprinter Repair Brea
More
Latest Posts
Fifth Wheel Repair Near Me Tustin
Mercedes Sprinter Repair Near Me Montclair
Mercedes Benz Sprinter Repair Brea