All Categories
Featured
Table of Contents
- – Camping Trailer Repair Near Me Riverside, CA
- – OCRV Center
- – Horse Trailer Repairs Riverside, CA
- – Travel Trailer Siding Repair Riverside, CA
- – Travel Trailer Siding Repair Riverside, CA
- – Travel Trailer Repairs Riverside, CA
- – Trailer Floor Repair Riverside, CA
- – Rv Trailer Repair Near Me Riverside, CA
- – Fifth Wheel Repair Near Me Riverside, CA
- – Trailer Awning Replacement Riverside, CA
- – Fifth Wheel Service Riverside, CA
- – Trailer Awning Replacement Riverside, CA
- – Camper Floor Repair Near Me Riverside, CA
- – Trailer Restoration Riverside, CA
- – Travel Trailer Floor Repair Riverside, CA
- – Camping Trailer Repair Near Me Riverside, CA
- – OCRV Center
Camping Trailer Repair Near Me Riverside, CA
Tony's recreational vehicle Parts and Service, Inc. lugs the largest parts inventory in the South and has a vast selection of difficult to obtain parts. We specialize in supplying a variety of solutions and parts for mobile homes (Recreational vehicles). We provide different services such as RV fixing, upkeep, and setup of parts and accessories.
Discover unmatched solution and integrity with us today. We service Beaver Dam, AZ to Leeds consisting of Ivins, St. George, Hurricane, and Zion. You definitely have questions, and you simply desire to talk with a real person. Give us a call, we address the phone. You can also fill out the "Obtain an Estimate" kind.
Horse Trailer Repairs Riverside, CA
We are centered in Grand Junction, Colorado and offer consumers in Mesa Region. Our Qualification training was done at the National Recreational Vehicle Training Academy and we are accredited by the RV Service Technician Association of America. You can feel great the job will certainly be done right.
Appliance Inspections & ServiceWe can function on a wide variety of recreational vehicle appliances and systems such as a/c unit, water heating systems, awnings, heating systems, ovens and varieties, fridges, and water systems (Riverside Cargo Trailer Repair). Roof Covering Inspections & Upkeep We can examine for and fix cracks, spaces, and splits in the roofing in addition to work with harmed vent covers and cracked seals
Whenever you travel you shouldIt is essential to check your recreational vehicle prior to and after each journey, whether you bring it in for a check up or do it on your own. Right here are some points you need to be inspecting each time you hit the trail: Headlights/brake lights Tires and lugs Connection to tow car Under the hood (motorhomes) Semi-annually you shouldRV's are constructed of elements that start to wear gradually.
Travel Trailer Siding Repair Riverside, CA
We concentrate on doing repair work, upkeep, minor paint and body repairs and maintenance of Lance Camper & Travel Trailers devices. For lots of people, their Lance Camper or Trailer will be the 2nd largest acquisition of their life besides their home, and for several of our consumers, it is their home.
Having your Lance Camper or Trailer repair services, services and upkeep preserved routinely can mean the difference in between a recreational vehicle experience and a RV fiasco. What establishes our service center other than a car dealership is we are not below to sell you a new one, we are below to repair and preserve what you have.
Travel Trailer Siding Repair Riverside, CA
We likewise share Lance Camper & Trailer that are on our lot. If you're unable to bring your system in for upkeep or fixings or if you're looking to deal with an upgrade as a Do it yourself task we've got you covered! Visit our for everything you'll require, consisting of basic components, accessories, and devices to assist you maintain your Recreational vehicle.
I decide to offer Mike a shot based upon his terrific reviews and everybody was exact other than the suppose client that left a less then 5 star testimonial. Mike as well really did not make me feel like just a consumer, yet seemed like he was an excellent friend of mine happy to provide a helping hand.
Travel Trailer Repairs Riverside, CA
When you check out Almaden recreational vehicle, you can satisfy several members of the Caprino Household. Possessed and operated considering that 1989, Chris and his family members very regard and regard the partnership with their customers. It's a place where the personnel puts in the time to cover every little thing carefully so there are no inquiries left unanswered.
You can see their numerous accreditations on the wall throughout your following go to. Over 25 years of trusted association with the produces provides Almaden RV distinct access to difficult to get the answer that the majority of stores are not able to get. When unsure, they don't "wing it", Almaden recreational vehicle locates the solutions and obtains the work done right the very first time.
Trailer Floor Repair Riverside, CA
Are you a proud proprietor of a RV? If so, you comprehend that a lot goes right into upkeep. From regular upkeep solutions to cleaning up the interior, you need to be attentive regarding how you look after your recreational vehicle. We desire to aid make the process easier at Cranberry Auto Solution Facility, and we do that with our detailed recreational vehicle fixing solution.
We intend to see to it that never ever takes place, and we attain that by educating our clients. Here are some typical problems you'll see in your motor home and what you ought to do: Even if you drive the most contemporary RV, your lorry will likely experience water leaks. This is unavoidable, as all Motor homes eventually give in to the components in some shape or kind.
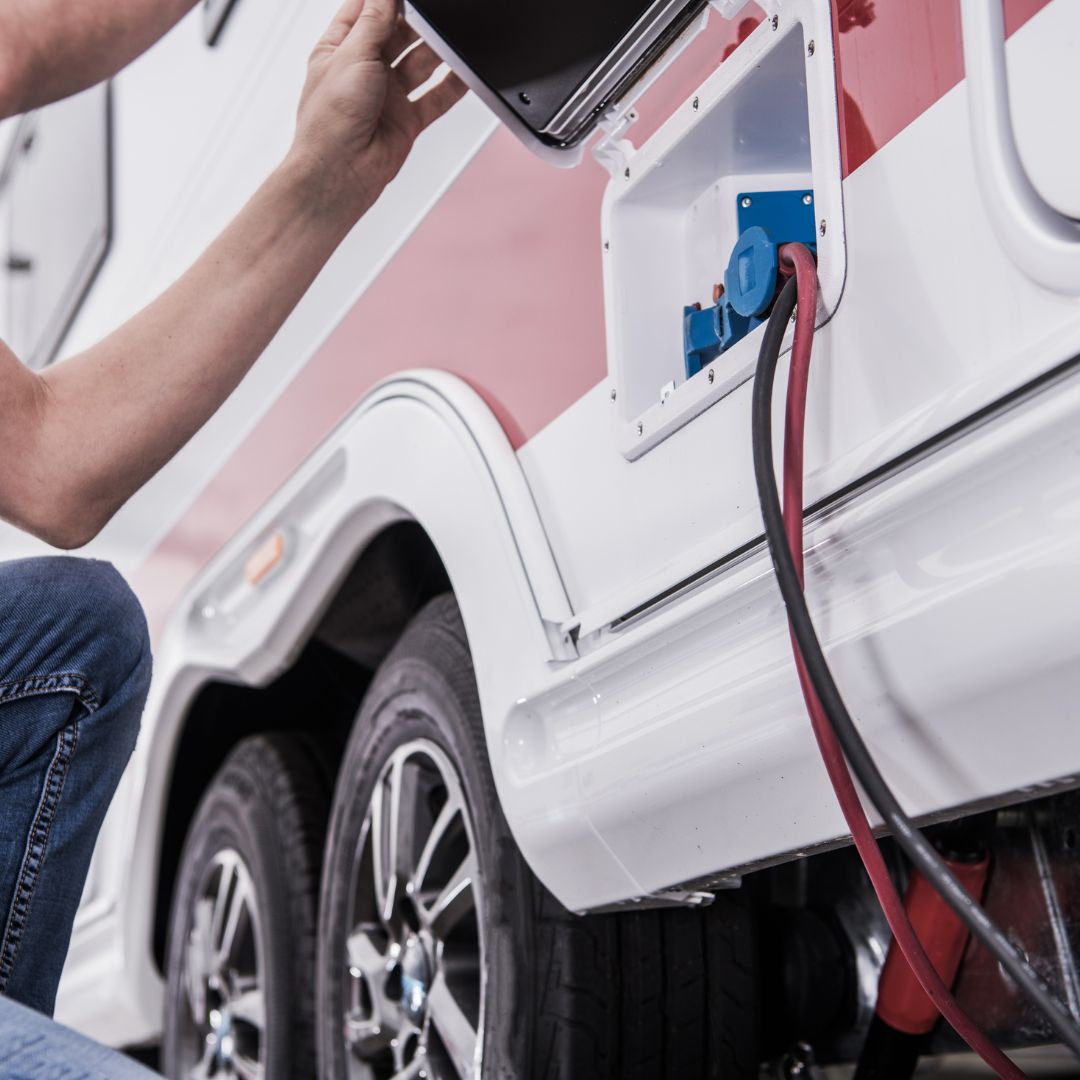
Along with coming in for service to repair the leak, also taking into consideration buying a high-quality recreational vehicle cover, which will certainly secure it from the elements when it's not in usage. If your motor home is having electrical problems, whether a light switch isn't working or the fronts lights are dark, it's crucial to connect to a qualified specialist.
Rv Trailer Repair Near Me Riverside, CA
Readily available to certified customers based upon loan provider credit credentials. Legitimate only at taking part CAMPING globe places. See supplier for details. Space where forbidden. Costs are comprehensive of all readily available discounts. Federal government fees, state taxes, dealership costs and discharges testing costs as applicable will certainly be included to adhere to state automobile codes.
Specs, tools, technical information, pictures and images are based on information available at time of publishing and are subject to transform without notification. Supply and floorplans differ by place, not all promoted manufacturers available at participating dealerships.
May not be combined with any other offer and not applicable to previous sales. Deal(s) valid at any type of Outdoor camping World Motor Home Sales or FreedomRoads dealer just. See supplier for details.
All civil liberties reserved. FreedomRoads LLC, its related dealerships and innovation partners are not responsible for typographical mistakes in price or mistakes in description of problem of a lorry's listed tools, accessories, cost or warranties. Any and all distinctions must be attended to prior to the sale of this car. Decision to offer a RV despite price is only figured out by the marketing dealership. * Ideal deal or $1,000 - deal has to remain in writing and gotten from a qualified motor home dealership.
Fifth Wheel Repair Near Me Riverside, CA
To receive ensured trade-in worth and/or appraisal, automobile should be in exact same or significantly the very same problem it remained in sometimes of deal. All deals undergo evaluation. $1,000 money will be tendered in the form of money, check, or cash order. Not legitimate in LA or OR.
Client needs to provide valid buyers order authorized by monitoring of contending supplier and proper documents outlining version year, make, brand name, model, choices, specifications, colors, and vin # of promoted unit. Customers order valid for 30 days from time of compose up. Contending supplier will be any type of licensed motor home dealer as acknowledged by the State in which the dealer operates and is not a Camping Globe RV Sales or FreedomRoads dealership.
Trailer Awning Replacement Riverside, CA
Any relevant trade-in needs to be revealed and given for assessment at time of request. See supplier for information.
A recreational vehicle will not last forever. After many journeys, you may locate the refrigerator isn't keeping points cool down any longer or the hot water heater's pilot burner will not activate. The worst aspect of it is that when you are traveling out from southern Louisiana, you might uncover that there are issues with your home appliances, electric system, pipes, or lights that will certainly cause you to transform the RV around and head back home.
Our parts selection is regularly expanding as we presently have products in the following groups: Generators, generator components, refrigerator parts and accessories, cooktop cooktops, dishwasher parts, microwaves, furnace and heater components, heating systems, hot water heater, washer and clothes dryer parts. Plumbing for blackwater tanks, pipes for freshwater containers, electrical systems, LP gas systems, lights, and solar power things.
Fifth Wheel Service Riverside, CA
You should service your RV a minimum of annually or every 5,000 to 10,000 miles, depending on use. Regular maintenance consists of checking the engine, brakes, tires, A/C, pipes, and electric systems. Regular inspections aid prevent expensive repairs and guarantee safe operation. For the response to every one of your recreational vehicle repair work needs throughout every one of Southeastern Louisiana, provide us a telephone call today! Dial 225-226-8256, and a participant of our group will be greater than satisfied to discover a time that ideal matches you and your active timetable!.
Legitimate only at getting involved Outdoor camping Globe places. See dealership for information. Government fees, state taxes, dealership charges and emissions screening fees as appropriate will be included to abide with state car codes.
We have striven to guarantee accuracy in the details given. New system photography for image objectives only. Specs, devices, technological information, pictures and pictures are based on details offered at time of uploading and undergo alter without notification. Supply and floorplans vary by location, not all marketed producers readily available at getting involved dealerships.
Trailer Awning Replacement Riverside, CA
Might not be combined with any other deal and not relevant to prior sales. Deal(s) legitimate at any type of Outdoor camping Globe Recreational Vehicle Sales or FreedomRoads dealership just. See supplier for information.
All rights scheduled. FreedomRoads LLC, its associated dealerships and innovation companions are exempt for typographical errors in price or errors in summary of problem of a vehicle's recognized equipment, devices, price or guarantees. Any and all distinctions have to be resolved before the sale of this automobile. Decision to offer a motor home no matter of rate is exclusively figured out by the marketing supplier. * Ideal deal or $1,000 - deal must be in writing and gotten from a licensed RV dealer.
Camper Floor Repair Near Me Riverside, CA
To obtain ensured trade-in worth and/or assessment, automobile should be in exact same or substantially the very same problem it was in at time of deal. All offers are subject to evaluation.
Client should offer legitimate buyers order signed by management of contending supplier and correct documents detailing design year, make, brand name, design, options, specs, shades, and vin # of marketed unit. Buyers order valid for 30 days from time of create up. Contending supplier will be any kind of accredited RV dealer as identified by the State in which the supplier operates and is not an Outdoor Camping Globe Motor Home Sales or FreedomRoads supplier.
Trailer Restoration Riverside, CA
Any kind of suitable trade-in needs to be revealed and offered evaluation sometimes of demand. Not applicable to previous sales. See dealer for information. Not legitimate in California. Void where forbidden.
Valid just at getting involved CAMPING Globe places. See dealer for information. Government costs, state tax obligations, dealer fees and emissions screening costs as relevant will be included to comply with state vehicle codes.
Specifications, devices, technical information, pictures and images are based on details readily available at time of uploading and are subject to transform without notice. Supply and floorplans differ by area, not all promoted suppliers offered at getting involved dealerships.
Travel Trailer Floor Repair Riverside, CA
May not be incorporated with any kind of various other offer and not applicable to prior sales. Offer(s) valid at any Outdoor camping Globe Recreational Vehicle Sales or FreedomRoads supplier only. See dealership for information. 2025 FreedomRoads, LLC. CAMPING WORLD and the CAMPING WORLD Logo design are registered trademarks of CWI, LLC. and utilized with permission.
To receive guaranteed trade-in value and/or appraisal, automobile must be in very same or considerably the same problem it was in at time of offer. All deals are subject to evaluation.
Client must provide valid purchasers order authorized by administration of competing dealership and proper documentation outlining model year, make, brand, version, alternatives, specifications, shades, and vin # of promoted unit. Buyers order valid for 1 month from time of write up. Completing supplier will be any type of certified recreational vehicle car dealership as identified by the State in which the supplier runs and is not a Camping Globe Recreational Vehicle Sales or FreedomRoads dealership.
Any kind of relevant trade-in must be divulged and given for assessment at time of request. Not suitable to previous sales. See dealership for information. Not valid in The golden state. Space where banned.
Camping Trailer Repair Near Me Riverside, CA
Your recreational vehicle or camper is more than simply a vehicleit's your home on wheels. Maintaining it in top condition is critical for safety, convenience, and performance. Our team concentrates on motorhome repair service and RV upkeep, providing comprehensive services to keep your Class A, B, or C motor home in peak condition.
OCRV Center
Address: 23281 La Palma Ave Yorba Linda, CA 92887Phone: (714) 909-1444
Email: art@ocrvcenter.com
OCRV Center
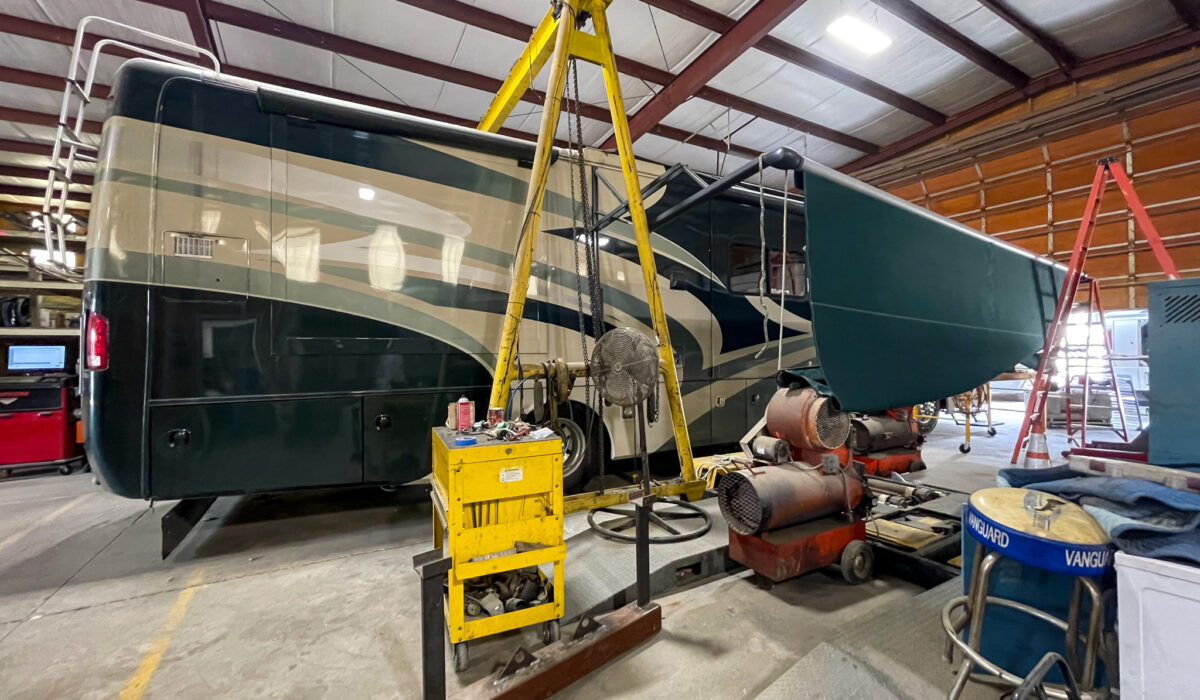
Repairing wiring concerns, battery substitutes, and generator service. Motor home tire installing, harmonizing, and placements for a safe trip. From little campers to large motorhomes, we manage all Recreational vehicle repairs with skilled care.
Fifth Wheel Service Riverside, CACamping Trailer Repair Near Me Riverside, CA
Travel Trailer Ceiling Repair Riverside, CA
Rv Trailer Repair Near Me Riverside, CA
Travel Trailer Awning Replacement Riverside, CA
Travel Trailer Roof Replacement Riverside, CA
Rv Trailer Repair Shops Near Me Riverside, CA
Travel Trailer Window Replacement Riverside, CA
Trailer Restoration Riverside, CA
Rv Trailer Service Near Me Riverside, CA
Rv Trailer Service Near Me Riverside, CA
Trailer Floor Repair Riverside, CA
Rv Trailer Service Near Me Riverside, CA
Trailer Windows Replacement Riverside, CA
Horse Trailer Repairs Riverside, CA
Trailer Window Replacement Riverside, CA
Travel Trailer Replacement Windows Riverside, CA
Trailer Awning Replacement Riverside, CA
Camper Floor Repair Near Me Riverside, CA
Trailer Window Replacement Riverside, CA
Travel Trailer Service Riverside, CA
Travel Trailer Floor Repair Riverside, CA
Fifth Wheel Repair Near Me Riverside, CA
Trailer Floor Repair Riverside, CA
Travel Trailer Replacement Windows Riverside, CA
Travel Trailer Awning Replacement Riverside, CA
Rv Travel Trailer Repair Near Me Riverside, CA
Trailer Floor Repair Riverside, CA
Travel Trailer Replacement Windows Riverside, CA
Travel Trailer Furniture Riverside, CA
Trailer Roof Repair Riverside, CA
Cargo Trailer Repair Riverside, CA
Travel Trailer Service Riverside, CA
Travel Trailer Window Replacement Riverside, CA
Travel Trailer Floor Repair Riverside, CA
Travel Trailer Siding Repair Riverside, CA
Travel Trailer Replacement Windows Riverside, CA
Travel Trailer Window Replacement Riverside, CA
Trailer Awning Replacement Riverside, CA
Cargo Trailer Repair Riverside, CA
Travel Trailer Furniture Riverside, CA
Travel Trailer Ceiling Repair Riverside, CA
Camping Trailer Repair Near Me Riverside, CA
Cargo Trailer Repair Riverside, CA
Trailer Roof Repair Riverside, CA
Travel Trailer Window Replacement Riverside, CA
Cargo Trailer Repair Riverside, CA
Rv Trailer Repair Shops Near Me Riverside, CA
Cargo Trailer Repair Riverside, CA
Travel Trailer Awning Replacement Riverside, CA
Horse Trailer Repair Near Me Riverside, CA
Cargo Trailer Repair Riverside, CA
Rv Trailer Service Near Me Riverside, CA
Travel Trailer Furniture Riverside, CA
Trailer Awning Replacement Riverside, CA
Travel Trailer Siding Repair Riverside, CA
Trailer Restoration Riverside, CA
Travel Trailer Replacement Windows Riverside, CA
Travel Trailer Ceiling Repair Riverside, CA
Rv Trailer Service Near Me Riverside, CA
Trailer Restoration Riverside, CA
Rv Travel Trailer Repair Near Me Riverside, CA
Travel Trailer Service Riverside, CA
Horse Trailer Repairs Riverside, CA
Cargo Trailer Repair Riverside, CA
Travel Trailer Window Replacement Riverside, CA
Trailer Restoration Riverside, CA
Travel Trailer Siding Repair Riverside, CA
Rv Trailer Service Near Me Riverside, CA
Travel Trailer Service Riverside, CA
Fifth Wheel Service Riverside, CA
Travel Trailer Window Replacement Riverside, CA
Fifth Wheel Service Riverside, CA
Travel Trailer Repairs Riverside, CA
Rv Trailer Repair Shops Near Me Riverside, CA
Trailer Window Replacement Riverside, CA
Camper Floor Repair Near Me Riverside, CA
Rv Trailer Service Near Me Riverside, CA
Affordable Seo Marketing Agency Riverside, CA
Local Seo Management Riverside, CA
OCRV Center
Table of Contents
- – Camping Trailer Repair Near Me Riverside, CA
- – OCRV Center
- – Horse Trailer Repairs Riverside, CA
- – Travel Trailer Siding Repair Riverside, CA
- – Travel Trailer Siding Repair Riverside, CA
- – Travel Trailer Repairs Riverside, CA
- – Trailer Floor Repair Riverside, CA
- – Rv Trailer Repair Near Me Riverside, CA
- – Fifth Wheel Repair Near Me Riverside, CA
- – Trailer Awning Replacement Riverside, CA
- – Fifth Wheel Service Riverside, CA
- – Trailer Awning Replacement Riverside, CA
- – Camper Floor Repair Near Me Riverside, CA
- – Trailer Restoration Riverside, CA
- – Travel Trailer Floor Repair Riverside, CA
- – Camping Trailer Repair Near Me Riverside, CA
- – OCRV Center
Latest Posts
Medicare Part D Plans Near Me Mission Viejo
Best Partd Insurance Company For Seniors Laguna Hills
Payroll Services Small Business Lake Forest
More
Latest Posts
Medicare Part D Plans Near Me Mission Viejo
Best Partd Insurance Company For Seniors Laguna Hills
Payroll Services Small Business Lake Forest