All Categories
Featured
Table of Contents
- – Commercial Irrigation Repair Rosemead, CA
- – Pacific Green Landscape Maintenance
- – Lawn Irrigation System Rosemead, CA
- – Lawn Irrigation Companies Rosemead, CA
- – Sprinkler Systems Installers Rosemead, CA
- – Sprinkler Systems Installers Rosemead, CA
- – Irrigation Repair Services Rosemead, CA
- – Commercial Irrigation Repair Rosemead, CA
- – Install Sprinkler System Rosemead, CA
- – Residential Irrigation Repair Rosemead, CA
- – Sprinkler System Installer Rosemead, CA
- – Pacific Green Landscape Maintenance
Commercial Irrigation Repair Rosemead, CA
Pacific Green Landscape Maintenance
6530 Whittier Ave Whittier, CA 90601-3919(562) 203-3567
Pacific Green Landscape Maintenance
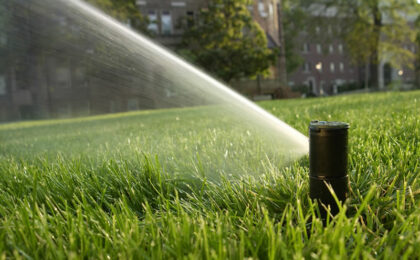
Everything looks also, flat, fresh and new. Essentially no damages to surrounding bushes, blossoms and ground covers.
Gilbert has actually transformed from an agricultural town into a successful and energised suburban area, understood for its family-friendly atmosphere, superior schools, and large recreational chances. The city's population has soared in current decades, making it among the fastest-growing areas in the country. This growth brings a need for high-grade irrigation options that can deal with the unique climate of the location.
Even more than 70% of the Earth's surface is composed of water, yet over 97% of this water contains salt and therefore pointless to people. Of the freshwater upon the planet, 90% is bound in ice at the end of the world in Antarctica. Thus less than.6% of all water on this earth is freshwater readily available to us for usages such as alcohol consumption, showering and certainly watering.
Lawn Irrigation System Rosemead, CA
While water is the most crucial resource for life as we understand it, it is increasingly coming under stress from too much demand, air pollution, and waste. Here at Complete Irrigation Services, drainage is something we do not take lightly. Initially, Total Irrigation Providers has actually specified the appropriate backflow prevention devices to secure your homes and the general public water.
We have actually mounted rain sensing units for water preservation. We have actually selected product that provides water uniformly and parsimonious. We did this while offering your grass and landscape the sustenance it needed for healthy and luscious plants. You might say, we were environment-friendly long prior to it ended up being stylish to be so! If you are trying to find a brand-new irrigation system, allow us offer you with an extensive layout.
If you currently have a system, let us evaluate your system with our extensive Watering Audit. This audit will certainly reveal any type of improvements that might need to be made to your existing system to enhance insurance coverage in those difficulty spots. Additionally, we can reveal you methods to minimize water make use of with run time modifications or other effectiveness offered.
Data from 2. This presumes you have watered your grass often in previous years.
Lawn Irrigation Companies Rosemead, CA
You'll have different upkeep needs depending upon the kind of private system you have. Open up ditch systems require to be cleared out every various other month in the wintertime and every other week in the summer season. When lawn, roots and other products develop, they press back on the water, producing resistance that might affect your water distribution.
Michigan's the majority of relied on household lawn sprinkler business Michigan Automatic Sprinkler in Business Twp, can install wise property lawn sprinkler for your home. Gone are the days of typical grass watering. Today's cutting-edge technology permits you to conveniently regulate and monitor your home's landscape automatic sprinkler no matter where you are. Smart sprinkler systems do greater than operate pre-set watering cycles.
Some systems interact with weather condition terminals and self-adjust to specific area times as necessary. Our team of household lawn sprinkler installment professionals can upgrade your system or design and mount a new one, after that aid you program it.
We supply both fix job and seasonal upkeep, making your lawn sprinkler a great investment and time saver. Watering your yard in an appropriate manner and regularly is the most vital point in seeing to it that the yard is efficient. Lots of people water their yard too lengthy and not often adequate.
Sprinkler Systems Installers Rosemead, CA
Appropriate watering is the crucial to opening a healthy, flourishing yard and landscape, and specialist watering services are how you acquire that essential! We supply a broad selection of irrigation solutions to ensure that you don't need to bother with a point. Irrigation Repair Services Rosemead. Our group is thorough, guaranteeing that your watering system is for the finest results
We'll turn on the water resource, check for leakages on backflow, activate each area, evaluate the areas for appropriate coverage, and look for any type of busted parts in the system. Having expert eyes on the situation at the beginning of the brand-new year will certainly ensure that your irrigation system is primed and all set for the hot summer months! Professional winterization is necessary to make sure that your irrigation system will be effectively decommissioned over the cooler months.
, irrigation systems can offer as preventive and preventive procedures against the harsh Michigan weather condition. Your watering system ought to have no trouble weathering the cold temperatures.
Sprinkler Systems Installers Rosemead, CA
It is one of the most reliable application of water resources. When a system is customized developed to fit your landscape features and fulfill the needs of your lot-size, it will really save water. Consequently, this will supply far better protection watering your residential or commercial property's backyard than just utilizing above ground sprinklers and hoses.
RGS Landscaping can examine your short and lasting demands of your building's landscape and grass, while safeguarding your financial investment and maintaining its design honesty. We look after the details and supply complete, timely and pleasant customer care. Our highly trained specialists are the foundation of our irrigation services division, and our tools and labor guarantee supplies years of fulfillment.
Of training course component of our experience is to focus on being the very best Howell watering experts. The most effective means to surpass your lawn is to allow experts install this sort of system. We solution and install all sorts of industrial and residential watering systems. We have the ability to supply clients an efficient well developed irrigation system utilizing the most up to date in water conservation strategies and expense conserving approaches.
Irrigation Repair Services Rosemead, CA
Lawn sprinklers are not precise and result in water overflow and missed areas that wind up being brownish. When the chilly climate rolls around we can also deal with services for winterizing your irrigation system also, if this is refrained from doing properly it can lead to an expensive fix later.
At Rainmaker Watering we have all the solutions you need in order to deal with enhancing upon your yard. Whether you have an exact idea of what you desire as for your landscaping or require expert innovative support, we can care for that for you. This consists of the choice for landscape lights.
Having problems with flooding or excess water moving in the direction of the foundation of your home? Allow us work with you to develop and set up drain trenching. And if your home or service needs normal care we can additionally deal with residential property management for you. When the climate transforms cooler we will be there for you also.
For something we can deal with snow plowing and salting This is very important for having the ability to be certain that your home is risk-free which you can continue on your daily regimen. For the finest solution in snow elimination and deicing you can trust us. Rainmaker Irrigation is additionally the group to trust fund for all things connected to seasonal cleaning in fall and spring.
Commercial Irrigation Repair Rosemead, CA
And in the spring you intend to provide your lawn and flowers an opportunity to grow without having a layer of debris reducing this development. When the fallen leaves begin to fall the fire risk increases. We can obtain your backyard tidied up from fallen leaves, twigs, and debris so you can have a safer lawn and landscape throughout the autumn period.
We start winterizing in Canton, MI at the start of October and finish by mid November. Without a correct winterization water can ice up inside your lawn sprinkler and can cause the pipes, heads and shutoffs to increase and possibly crack. Do not take the threat and have the specialists winterize your irrigation system.
Install Sprinkler System Rosemead, CA
Thomas Irrigation will certainly offer you with the best top-notch service in irrigation. We will certainly examine for leakages on the within along with the beyond the sprinkler plumbing, check performance of all valves, program the automated controller for proper water procedure, clean, straighten and preserve your lawn sprinkler heads to maintain your system functioning to its high quality capacity.
We get rid of all watering lines, check for leaks or damaged lines that need to be fixed in the spring, and shut off irrigation controller. New Installations Service/Repairs Spring Turn-On Winterizations Back-Flow Testing Secondly Water Meter Yearly Solution Agreements Thomas Irrigation solutions all of Northwest Indiana including: Schererville, Highland, Munster, St. John, Dyer, Crown Point, Merrillville, Valparaiso and a lot more.
You can download and install a PDF file of our yearly service contract below. Please complete this printed agreement and mail to: 441 W. Key StreetSchererville, IN, 46375Or Fax to: (219 )322-4849.
Over 25 years of experience for quality sprinkler systems and repair work services. Our experts can add and eliminate lawn sprinklers for far better protection for your grass, flowers, and shrubs.
Residential Irrigation Repair Rosemead, CA
Michigan Watering Acquiring LLC is a family members had service fully qualified and guaranteed with over two decades of hands on experience and offer services to both business and household consumers. Our solutions vary from repair services, upkeep, setups, well conversions, and other water saving approaches. Right Here at Michigan Watering Contracting LLC we take satisfaction in what we do which shows in our job and our goal is to bring our clients the finest services utilizing just the first-rate products from the leading makers.
Prior to the winter hits, see to it to schedule our sprinkler winterization service. Our lawn sprinkler tech will certainly utilize an air compressor to blow the water out from every one of your lawn sprinkler lines. Flushing your automatic sprinkler out with air will certainly secure your lawn sprinkler lines and vacuum breaker from freeze damage throughout the wintertime months.
Sprinkler System Installer Rosemead, CA
Watering systems are essential. Problems have to be dealt with swiftly. That's where we are available in. We can detect and deal with issues with your irrigation system swiftly. We can also supply a custom strategy to aid you shield and maintain your water delivery system gradually. Our specialist sprinkler and watering system repair work: Piping Valves Nozzles Replacement parts Reduced water stress Irregular water flow from your nozzles Too much water at a time Residential or commercial property damages Water leaks, consisting of those that show up far from your sprinkler system Bear in mind, automatic sprinkler problems might not always be obvious.
Piping system issues can sometimes be tough to determine. Faulty tools can lead to unwanted water discharge underground that isn't constantly very easy to determine at. An underground is in some cases just apparent when your water costs boosts considerably or you uncover significant property damage. Already, repairs might be very costly.
Our experts will certainly assist recognize feasible indicators of water damages. We function with both industrial and household lawn sprinklers to avoid water issues for excellent!
Pacific Green Landscape Maintenance
Address: 6530 Whittier Ave Whittier, CA 90601-3919Phone: (562) 203-3567
Email: pacificgreencompany@gmail.com
Pacific Green Landscape Maintenance
Thomas Irrigation, Inc. is a family members owned service that started in 1993. Proprietor Drew Thomas, after retiring from IBM Company in 1993, started business with his kid Matthew. After seeing what was going on in the watering industry around Lake Region, Indiana, Drew made a decision that there required to be a modification in the means watering firms were doing service.
Landscape Irrigation Repair Rosemead, CAIrrigation Service Rosemead, CA
Sprinkler Installation Companies Rosemead, CA
Lawn Sprinkler Companies Rosemead, CA
Sprinkler Installation Companies Rosemead, CA
Lawn Irrigation Companies Rosemead, CA
Irrigation Systems Installers Rosemead, CA
Commercial Irrigation Services Rosemead, CA
Irrigation System Installers Rosemead, CA
Sprinkler System Installation Rosemead, CA
Sprinkler Systems Near Me Rosemead, CA
Sprinkler System Installation Rosemead, CA
Sprinkler System Installer Rosemead, CA
Irrigation System Repair Service Rosemead, CA
Sprinkler Systems Installers Rosemead, CA
Landscape Irrigation Repair Rosemead, CA
Sprinkler System Installation Rosemead, CA
Irrigation System Maintenance Rosemead, CA
Lawn Sprinkler Service Rosemead, CA
Sprinkler Installer Rosemead, CA
Lawn Sprinkler Service Rosemead, CA
Irrigation Service Rosemead, CA
Sprinkler System Installation Rosemead, CA
Landscape Irrigation Repair Rosemead, CA
Irrigation System Repair Service Rosemead, CA
Lawn Irrigation System Rosemead, CA
Lawn Sprinkler Installers Rosemead, CA
Sprinkler System Installation Rosemead, CA
Commercial Irrigation Services Rosemead, CA
Commercial Irrigation Repair Rosemead, CA
Sprinkler System Installer Rosemead, CA
Irrigation Installer Rosemead, CA
Sprinkler Systems Installers Rosemead, CA
Sprinkler Systems Installers Rosemead, CA
Landscape Irrigation Repair Rosemead, CA
Lawn Sprinkler Service Rosemead, CA
Install Sprinkler System Rosemead, CA
Lawn Irrigation Services Rosemead, CA
Landscape Irrigation Repair Rosemead, CA
Sprinkler Installer Rosemead, CA
Sprinkler Installer Rosemead, CA
Irrigation Service Rosemead, CA
Lawn Sprinkler Service Rosemead, CA
Lawn Irrigation Services Rosemead, CA
Lawn Irrigation Services Rosemead, CA
Lawn Irrigation Services Rosemead, CA
Irrigation Installers Rosemead, CA
Sprinkler System Installer Rosemead, CA
Lawn Sprinkler Companies Rosemead, CA
Installing A Sprinkler System Rosemead, CA
Sprinkler Installation Companies Rosemead, CA
Sprinkler Installation Companies Rosemead, CA
Irrigation System Maintenance Rosemead, CA
Sprinkler System Installation Rosemead, CA
Sprinkler System Installation Rosemead, CA
Sprinkler Installation Companies Rosemead, CA
Irrigation System Repair Service Rosemead, CA
Irrigation System Installers Rosemead, CA
Irrigation Installer Rosemead, CA
Sprinkler System Installation Rosemead, CA
Residential Irrigation Repair Rosemead, CA
Irrigation Systems Installers Rosemead, CA
Sprinkler Installers Rosemead, CA
Near Here Seo Optimization Services Rosemead, CA
Companies Near Me Seo Solutions Rosemead, CA
Pacific Green Landscape Maintenance
Table of Contents
- – Commercial Irrigation Repair Rosemead, CA
- – Pacific Green Landscape Maintenance
- – Lawn Irrigation System Rosemead, CA
- – Lawn Irrigation Companies Rosemead, CA
- – Sprinkler Systems Installers Rosemead, CA
- – Sprinkler Systems Installers Rosemead, CA
- – Irrigation Repair Services Rosemead, CA
- – Commercial Irrigation Repair Rosemead, CA
- – Install Sprinkler System Rosemead, CA
- – Residential Irrigation Repair Rosemead, CA
- – Sprinkler System Installer Rosemead, CA
- – Pacific Green Landscape Maintenance
Latest Posts
Fifth Wheel Repair Near Me Tustin
Mercedes Sprinter Repair Near Me Montclair
Mercedes Benz Sprinter Repair Brea
More
Latest Posts
Fifth Wheel Repair Near Me Tustin
Mercedes Sprinter Repair Near Me Montclair
Mercedes Benz Sprinter Repair Brea