All Categories
Featured
Table of Contents
- – Black Mountain Plumbing
- – Why San Diego Home Cooks Need These Garbage Di...
- – What Not to Put Down Your Garbage Disposal – E...
- – Natural Cleaning Hacks to Keep It Fresh and Sharp
- – How to Unjam and Reset Your Garbage Disposal S...
- – Signs Your Garbage Disposal Needs Professional...
- – Repair vs Replace: Making the Right Choice in ...
- – Preventive Maintenance Tips Tailored for San D...
- – Common Garbage Disposal Problems in San Diego ...
- – We Can Help! Contact Us Today
- – Black Mountain Plumbing
Black Mountain Plumbing
9909 Hibert Street Suite E San Diego, CA 92131(858) 536-4161
Black Mountain Plumbing
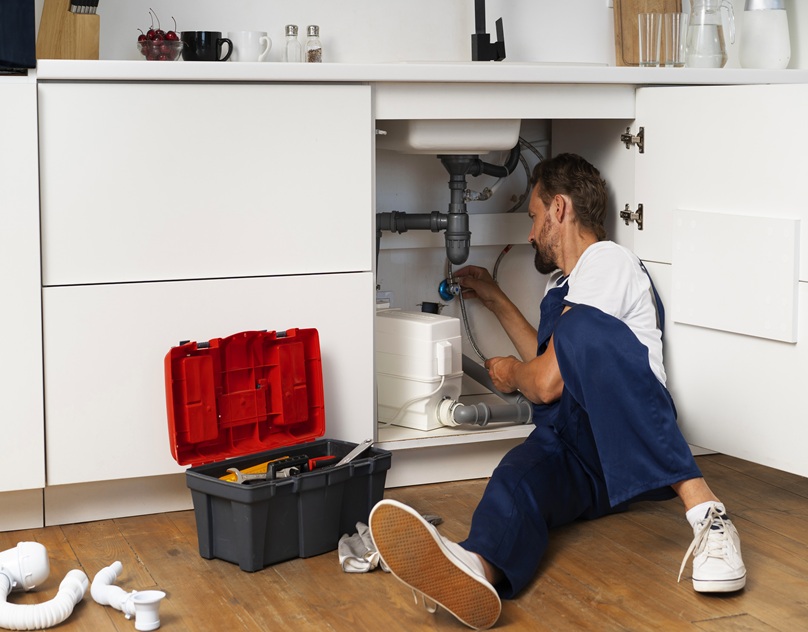
garbage disposal repair San Diego rarely becomes necessary when you start using clever everyday prevention methods into your kitchen routine. San Diego kitchens face unique challenges due to moderately hard water that encourages mineral deposits on seals and blades, paired with common use of fresh area produce, fish remains, and starchy sides that readily lead to jams and clogs. These kitchen garbage disposal hacks for San Diego home cooks deliver effective low-effort solutions that keep your unit running smoothly, eradicate unpleasant odors, naturally sharpen blades, and greatly extend the total lifespan of your unit. If you're making fast weeknight dinners or large holiday meals, these methods diminish irritation, avert expensive malfunctions, and restore the enjoyment of cooking without unplanned interruptions. By addressing the main causes of jammed garbage disposal, poor draining, constant humming, and repeated bad smells, you gain control of your kitchen plumbing and significantly lower the requirement for emergency service calls.
Many San Diego households that embrace these techniques notice a dramatic reduction in troubles and gain greater confidence during daily disposal use. The sections that follow offer comprehensive instructions detailed lists of safe habits, and thorough explanations designed for every skill level—from beginners learning the basics to advanced cooks wanting to perfect their equipment. These approaches include both simple and sophisticated prevention and in-depth troubleshooting, ensuring your garbage disposal remains a reliable kitchen companion.
For comprehensive plumbing support when needed, check out our main plumbing services (Plumber For Clogged Toilet Near Me Torrey Pines) or check residential plumbing solutions
Why San Diego Home Cooks Need These Garbage Disposal Hacks
San Diego's municipal water regularly features elevated mineral levels due to its dependence on imported supplies, leading to progressive scale formation inside the grinding chamber and surrounding rubber components. The slow buildup restricts blade movement, reduces cutting efficiency, and raises the chance of leaks, motor overload, and early malfunction. Regional culinary preferences intensify these challenges: fibrous greens from local farmers markets, common rice and pasta dishes in family meals, and large holiday food quantities often go beyond the unit's rated capacity. Reliable industry research from major appliance makers and plumbing associations demonstrates that steady care practices can greatly extend the average garbage disposal life well beyond the usual eight-year average, sometimes reaching fifteen years or longer under optimal conditions.
Implementing daily and weekly garbage disposal maintenance tips builds a safeguard system that successfully addresses both water chemistry and typical usage patterns prevalent across San Diego neighborhoods. Simple habits such as longer cold water runs, controlled portioning of food waste, and regular natural cleans greatly lower the probability of unexpected malfunctions. Home cooks who regularly use these techniques benefit from much quieter performance, permanently improved kitchen odors, and genuine assurance that their kitchen plumbing infrastructure is safeguarded from typical local challenges. The result brings more efficient meal preparation, fewer sudden disruptions, and overall greater satisfaction with everyday kitchen activities.
These straightforward preventive measures preserve your appliance value and offer genuine peace from everyday worry. If you observe any early warning signs, give us a call for a complimentary consultation. Many homeowners also benefit from our whole-house water filtration solutions that address hard water concerns at the source.
What Not to Put Down Your Garbage Disposal – Essential List
Understanding precisely what not to put in garbage disposal stands as the single most powerful preventive step that prevents the majority of common garbage disposal problems. Grease, oils, and fats rank among the most damaging substances because they coat interior surfaces and harden when cooling, building lasting obstructions that collect extra waste and eventually cause restricted flow or complete backups. Stringy and fibrous foods—including celery stalks, artichoke leaves, corn husks, asparagus ends, and potato peels—often wrap securely around the cutting blades, creating jammed garbage disposal conditions that prevent spinning and produce the familiar humming noise most people identify right away.
Starchy foods form another serious danger category: cooked pasta, rice, bread, potato peels soak up moisture and grow into thick, sticky masses that obstruct both the disposal chamber and connecting drain lines. Eggshells, though often considered harmless, contribute minuscule fragments that accumulate and interfere with grinding efficiency over time. Coffee grounds behave similarly to wet cement when pressed together, while bones, nutshells, fruit pits, and other hard materials can damage, bend, or break internal components. In local San Diego kitchens where hard water naturally accelerates scale formation, these problematic items worsen existing wear and dramatically increase frequency and severity of clogs.
Gaining this understanding transforms everyday dish cleaning into an powerful preventive habit. A basic mesh strainer traps larger scraps before they enter the unit. Consistent cold water usage removes waste much more efficiently than hot water, which can melt grease and allow it to resolidify farther down the pipes. By deliberately excluding these risky substances, you maintain consistently smooth operation and significantly lower the need for professional intervention. For additional prevention strategies, check our comprehensive guide to clogged pipes in San Diego.
Steering clear of these risky items maintains smooth kitchen operation and eliminates unnecessary stress. If you require expert guidance for your specific setup, professional consultation is readily available. Homeowners in various neighborhoods have found value in our Poway plumbing repairs and Rancho Bernardo plumbing repairs services.
Natural Cleaning Hacks to Keep It Fresh and Sharp
How to clean garbage disposal naturally regularly appears in the most common questions among San Diego cooks because foul odors and worn blades form fast with San Diego water. The citrus and ice deep clean method continues to be the most recommended and consistently effective approach: drop quartered citrus fruits right into the garbage disposal, add a generous handful of ice cubes, then run the disposal with a steady stream of cold water. The natural citric acids effectively dissolve built-up grease, ice provides abrasive scouring the grinding surfaces, and the released citrus oils impart a fresh, long-lasting scent that lasts for days post-cleaning.
For deeper cleaning, use ½ cup baking soda poured directly down the drain followed by 1 cup white vinegar. Give the fizzing mixture time for ten to fifteen minutes then flush thoroughly with hot—but never boiling—water without harming rubber seals. This reaction powerfully removes stuck residue and neutralizes persistent odors at their source (Plumber For Clogged Toilet Near Me Torrey Pines). A quick daily dish soap rinse using a few drops of liquid dish detergent combined with a continuous cold water flow clears light residue and keeps everything moving freely throughout the system
Creating a weekly or after-heavy-cooking routine for these cleans keeps everything at peak efficiency and prevents the development of foul smells that frequently trigger requests for garbage disposal repair San Diego. Seasonal modifications are especially important during holiday seasons when extra cooking sends more scraps of scraps down the drain. Additional techniques include occasional use of frozen vinegar cubes for more thorough sanitizing. These simple approaches produce immediate improvements in smell elimination and blade sharpness while supporting longer equipment durability. When smells or reduced function continue despite consistent use of these routines, professional inspection can find and resolve hidden problems before they escalate.
These simple cleaning routines provide fast, visible improvements and ensure continued protection. See our drain cleaning options for more intensive cleaning when necessary. Homeowners across the area trust our Santee plumbing expertise and Miramar plumbing services.
How to Unjam and Reset Your Garbage Disposal Safely
A non-working or humming garbage disposal typically results from a temporary jam or basic overload rather than permanent damage. Plumber For Clogged Toilet Near Me Torrey Pines. First ensure power is fully disconnected—either at the breaker or by unplugging it—to remove all electrical risk. Use the hex key usually included with the unit into the hexagonal opening located on the bottom of the motor housing and gently rock it back and forth to manually rotate the flywheel and dislodge the obstruction
After clearing the jam, locate the red garbage disposal reset button on the bottom of the disposal and push it to reset the circuit post-overload. Restore power, run a strong flow of cold water, and test with a few soft food particles to verify proper operation. If jamming persists after repeated clearing, refrain from forcing it further since extra force can damage internal parts.
Safety must remain the highest priority: never insert hands into the disposal, even when power is off; use long-handled tongs or wooden utensils to clear visible items safely. These basic steps reliably handle the majority of minor jammed garbage disposal problems without needing tools or expert help. Frequent application of these steps builds confidence and preparedness for surprise issues. For recurring or stubborn jamming that basic methods can't solve, qualified technicians can identify and address underlying causes efficiently. Numerous residents appreciate in our emergency plumbing in Rancho Bernardo when quick response becomes necessary.
Signs Your Garbage Disposal Needs Professional Repair
Multiple unmistakable indicators reveal when basic home fixes are no longer enough and professional garbage disposal repair San Diego becomes essential. Ongoing humming after clearing and reset and clearing obvious blockages usually points to deeper mechanical complications or severe motor overload. Grinding, scraping, or metallic sounds while running strongly suggest damaged or worn blades that need prompt attention. Visible leaks beneath the sink frequently result from worn gaskets, cracked casings, or loose fittings—conditions that hard water exposure in San Diego accelerates significantly as time passes.
Slow or incomplete draining after consistent cleaning points to substantial internal accumulation or partial blockages extending beyond the disposal unit. Repeated tripping of the reset button or complete power failure frequently means wiring issues or motor failure. Delaying response to these indicators frequently causes greater water damage, widespread bad odors, or catastrophic unit breakdown requiring full replacement. Early identification of these symptoms enables fixing while problems are manageable and repair expenses remain affordable.
Black Mountain Plumbing brings over 30 years of expert experience, current industry certifications, and a complete satisfaction guarantee to provide fast, reliable solutions. Homeowners throughout the area trust our customer reviews and San Diego plumbing repairs expertise.
Repair vs Replace: Making the Right Choice in San Diego
Choosing between repair and full replacement hinges on several objective considerations. Average repair costs throughout San Diego typically go from $100–$250 for common fixes covering jam clearing, gasket replacement, reset fixes, and basic electrical repairs. Full replacement projects, including new unit plus installation labor, typically cost $200–$550 depending upon selected brand, horsepower rating, and specific installation requirements.
Repair makes the most financial sense when your unit is under 10 years old, when the issue is limited, and the motor continues functioning properly. Replacement proves more advantageous over time when the disposal exceeds ten to twelve years of service, demonstrates repeated motor overloads, or shows significant corrosion due to extended hard water exposure. Leading brands including InSinkErator, Waste King, and Moen deliver exceptional durability and performance when properly sized for your home and correctly installed per local regulations.
SChoosing wisely safeguards both your immediate budget and future kitchen convenience. Our professional team offers impartial evaluations and fully transparent pricing to help you choose the best option based on your exact needs. Many homeowners discover additional value in our garbage disposal repair and installation services.
Preventive Maintenance Tips Tailored for San Diego Kitchens
Regular daily practices establish the base of long-term disposal performance and operation. Always use a steady, strong flow of cold water for a minimum of 30 seconds before, during, and after grinding operations to properly flush waste and stop grease from hardening inside the plumbing lines. Process food waste in modest quantities rather than large batches to prevent motor overloads. Place a basic strainer over the drain opening to trap larger particles that may lead to clogs.

Set up regular monthly deep cleans using reliable natural cleaning methods to keep blades sharp and seals clean from scale. Check the reset button from time to time and look under the sink for signs of water, rust, or loose fittings. In high-use times like holidays or big gatherings, be extra careful by limiting stringy and starchy items going into the disposal.
Steady implementation of these routines substantially decreases urgent service needs and greatly increases equipment durability. We deliver customized maintenance programs designed especially for San Diego homes to complement these daily habits and identify minor concerns before they develop into significant problems. Explore our preventing plumbing issues guide for further techniques.
Common Garbage Disposal Problems in San Diego and How to Avoid Them
Hard water mineral accumulation is the leading issue faced by San Diego kitchens. Hard water scale slowly reduces blade action and compromises seal effectiveness over time. Regular application of natural flushing techniques and consideration of water softening options greatly reduces this pervasive local condition. Excessive loading during family-sized meal preparation or during holidays places undue strain on the motor, often causing frequent reset trips or quicker component degradation.
Practicing measured food waste amounts, extended cold water flushing, and consistent use of proper disposal practices ensures operation stays within design specifications. These modest behavioral modifications prevent the majority of recurring clogs, odors, and performance degradation issues that homeowners commonly encounter.
Preventive care is always more cost-effective and easier than repair. When difficulties continue despite diligent preventive measures, professional intervention guarantees thorough resolution and long-term reliability. Numerous homeowners appreciate from our slow drain after garbage disposal expertise.
We Can Help! Contact Us Today
Our team is here as your reliable partner for garbage disposal repair San Diego. Our professional team focus on quick, dependable repairs and preventive maintenance that return your kitchen to normal promptly and eliminate ongoing stress. a family in Poway dealing with persistent odors, we offer fixes that improve everyday convenience. Located at 9909 Hibert Street, Suite E San Diego, CA 92131, we proudly serve San Diego County and nearby communities like Poway, Chula Vista, Oceanside, Escondido, Carlsbad, El Cajon, Vista, San Marcos, Encinitas, La Mesa, Santee, National City, Imperial Beach, Lemon Grove, Coronado, Del Mar, Rancho Bernardo, Scripps Ranch, and Mira Mesa with expertise and dedication. Call (858) 536-4161 for a consultation. Backed by over 30 years of service and a satisfaction guarantee, we guarantee flawless plumbing performance. The aggravation of a broken disposal while cooking goes away, replaced with confidence and ease. Let our team manage the stress so you can concentrate on cooking and spending time with loved ones. Contact us today to feel the difference expert service provides.
Black Mountain Plumbing
Address: 9909 Hibert Street Suite E San Diego, CA 92131Phone: (858) 536-4161
Email: blackmtnplumbing@gmail.com
Black Mountain Plumbing
Plumbing Installation Torrey Pines, CA
Gas Line Plumber Torrey Pines, CA
Plumber For Clogged Toilet Near Me Torrey Pines, CA
Gas Line Plumber Torrey Pines, CA
Kitchen Plumbing Torrey Pines, CA
Garbage Disposal Installation Torrey Pines, CA
Plumber Company Near Me Torrey Pines, CA
Best Plumber Torrey Pines, CA
Water Line Repair Torrey Pines, CA
Garbage Disposal Installation Torrey Pines, CA
Local Plumber Torrey Pines, CA
Residential Plumbing Repair Near Me Torrey Pines, CA
Plumber Company Near Me Torrey Pines, CA
Water Leak Repair Torrey Pines, CA
Garbage Disposal Installation Torrey Pines, CA
Best Plumber Torrey Pines, CA
Plumber Company Near Me Torrey Pines, CA
Water Line Repair Torrey Pines, CA
Water Leak Repair Torrey Pines, CA
Plumbing Installation Near Me Torrey Pines, CA
Near Me Plumber Torrey Pines, CA
Plumber Shower Installation Torrey Pines, CA
Plumbing Installation Near Me Torrey Pines, CA
Local Plumbing Near Me Torrey Pines, CA
Plumbing Installers Near Me Torrey Pines, CA
Residential Plumbing Services Near Me Torrey Pines, CA
Shower Repair Torrey Pines, CA
Garbage Disposal Installation Torrey Pines, CA
Garbage Disposal Installation Torrey Pines, CA
Affordable Plumbing Near Me Torrey Pines, CA
Plumbing Installation Services Torrey Pines, CA
Bathroom Plumber Torrey Pines, CA
Residential Plumbing Contractors Near Me Torrey Pines, CA
Kitchen Plumbing Torrey Pines, CA
Residential Plumbing Repair Near Me Torrey Pines, CA
Garbage Disposal Installation Torrey Pines, CA
Garbage Disposal Installation Torrey Pines, CA
Plumbing Installation Torrey Pines, CA
Residential Plumber Torrey Pines, CA
Plumber For Clogged Toilet Near Me Torrey Pines, CA
Residential Plumbing Contractors Near Me Torrey Pines, CA
Residential Plumbing Contractors Near Me Torrey Pines, CA
Plumber Shower Installation Torrey Pines, CA
Water Leak Repair Torrey Pines, CA
Water Heater Installers Torrey Pines, CA
Water Heater Installers Torrey Pines, CA
Plumbing Installation Torrey Pines, CA
Water Filtration Services Near Me Torrey Pines, CA
Bathroom Plumber Torrey Pines, CA
Near Me Plumber Torrey Pines, CA
Plumbing Installation Near Me Torrey Pines, CA
Plumber Shower Installation Torrey Pines, CA
Plumbing Installation Services Torrey Pines, CA
Plumbing Installation Torrey Pines, CA
Affordable Plumbing Near Me Torrey Pines, CA
Plumbing Installation Near Me Torrey Pines, CA
Plumbing Installation Near Me Torrey Pines, CA
Plumber Company Near Me Torrey Pines, CA
Plumber For Clogged Toilet Near Me Torrey Pines, CA
Plumbers In Torrey Pines, CA
Local Plumbing Near Me Torrey Pines, CA
Best Plumbing Torrey Pines, CA
Plumbing Installers Near Me Torrey Pines, CA
Plumbing Installers Near Me Torrey Pines, CA
Plumbing Installation Torrey Pines, CA
Residential Plumbing Services Near Me Torrey Pines, CA
Residential Plumbing Services Near Me Torrey Pines, CA
Affordable Plumber Near Me Torrey Pines, CA
Residential Plumbing Repair Near Me Torrey Pines, CA
Plumbing Installation Torrey Pines, CA
Local Plumbing Near Me Torrey Pines, CA
Plumber Shower Installation Torrey Pines, CA
Residential Plumbing Services Near Me Torrey Pines, CA
Plumbers In Torrey Pines, CA
Affordable Plumber Near Me Torrey Pines, CA
Plumbing Installers Near Me Torrey Pines, CA
Near Me Plumber Torrey Pines, CA
Kitchen Plumbing Torrey Pines, CA
Affordable Plumber Near Me Torrey Pines, CA
Water Filtration Services Near Me Torrey Pines, CA
Finding A Good Seo For Law Firms Torrey Pines, CA
Close To Me Seo Services Near Me Torrey Pines, CA
Black Mountain Plumbing
Plumbing Installation Near Me Torrey Pines, CA
Plumber For Clogged Toilet Near Me Torrey Pines, CA
Table of Contents
- – Black Mountain Plumbing
- – Why San Diego Home Cooks Need These Garbage Di...
- – What Not to Put Down Your Garbage Disposal – E...
- – Natural Cleaning Hacks to Keep It Fresh and Sharp
- – How to Unjam and Reset Your Garbage Disposal S...
- – Signs Your Garbage Disposal Needs Professional...
- – Repair vs Replace: Making the Right Choice in ...
- – Preventive Maintenance Tips Tailored for San D...
- – Common Garbage Disposal Problems in San Diego ...
- – We Can Help! Contact Us Today
- – Black Mountain Plumbing
Latest Posts
Website Design Agency Chino Hills
Fontana Local Seo Services For Small Business
Orange Internet Marketing For Contractors
More
Latest Posts
Website Design Agency Chino Hills
Fontana Local Seo Services For Small Business
Orange Internet Marketing For Contractors